
There's nothing quite like the feeling of booting up a gaming PC you've built with your own two hands. It's a journey that gives you complete command over every single component, leading to a rig that's perfectly tuned for how you play. This guide will walk you through the entire process, whether you're sourcing parts in Toronto or putting it all together in Vancouver.
Why Build Your Own Gaming PC in Canada?
Opting to build your own gaming PC in Canada puts you squarely in the driver's seat. Sure, pre-built systems from big-box stores in Calgary or Montreal are convenient, but a custom build means you're making zero compromises. You decide what's important.
Want a beast of a graphics card for buttery-smooth 4K gaming? You got it. Need a blazing-fast NVMe SSD to slash loading times? No problem. You control the budget and where every dollar goes.
The whole process is incredibly satisfying. It’s a project that takes you from a pile of boxes to a high-performance machine you can proudly say you built. You’ll also pick up some serious knowledge about computer hardware along the way, which for many of us, is a huge part of the fun.
Taking Control of Your Gaming Experience
When you build it yourself, you avoid the classic traps of pre-built systems, like weird proprietary parts that make upgrades a nightmare or cheap power supplies that choke your performance. You know exactly what’s inside your machine and what you paid for.
Knowing the Canadian market helps, too. For years, many of us in places like Ottawa and Edmonton preferred buying parts in-store to see and touch the components, but the online scene is booming. You can now find incredible selection and deals online that just weren't available before. For more on this, Grand View Research offers some great insights into market trends.
The biggest advantage of a DIY build is creating a perfectly balanced system. You aren't stuck paying for bloatware you’ll never use or a processor that’s total overkill for your needs. Every dollar is spent with purpose.
This level of control doesn't stop after the first build. When a new graphics card comes out, you'll know exactly how to swap it in. Need more RAM? You’ll be confident opening up the case and adding it yourself. And if you're looking for a hand to get started, checking out options for custom PC builds in Hamilton can offer that expert guidance to bring your dream rig to life.
To give you a clearer picture, the entire process can be broken down into five main phases.
Your PC Building Journey at a Glance
| Phase | What It Involves | Key Goal |
|---|---|---|
| 1. The Blueprint | Researching and choosing every component, from the CPU to the case. | Create a balanced, compatible parts list that fits your budget and performance goals. |
| 2. The Assembly | Physically putting all the components together inside the PC case. | Correctly and safely install all hardware to build a functional computer. |
| 3. First Boot | Configuring the BIOS/UEFI to ensure all components are recognized. | Prepare the system for the operating system and enable core features like XMP. |
| 4. Software Setup | Installing your operating system (like Windows 11) and essential drivers. | Get the PC running with a stable OS and the software needed for your hardware to work properly. |
| 5. Testing & Tweaking | Running benchmarks and stress tests to check for stability and performance. | Ensure your new PC is stable, cool, and delivering the performance you paid for. |
Each of these stages is a critical step on the path to creating your ultimate gaming machine.
Selecting Your PC Components Like a Pro
Alright, this is where the real fun starts. Picking your components is like putting together a championship team—every part has a job, and how well they work together defines your PC's performance. Instead of drowning in technical specs, let's cut through the noise and focus on what actually matters for Canadian gamers piecing together a new rig.
At the heart of any gaming PC, you've got six core components that need to sing in harmony.
- Central Processing Unit (CPU): This is the brain, crunching all the numbers and executing instructions.
- Graphics Processing Unit (GPU): For a gaming PC, this is the soul of the machine. It's what draws the stunning worlds you'll be exploring.
- Motherboard: Think of this as the central nervous system. It’s the circuit board that connects everything and lets all the parts talk to each other.
- Random Access Memory (RAM): This is your PC's short-term memory, holding data that needs to be accessed in a flash.
- Storage (SSD/HDD): Your long-term memory, where the operating system, games, and all your files live.
- Power Supply Unit (PSU): This is the circulatory system, delivering clean and stable power to every single component.
The absolute key here is balance. It makes no sense to pair a beastly, top-tier GPU with an entry-level CPU. One will just end up waiting for the other to catch up, creating a performance "bottleneck." Your goal is to choose parts that are in the same league, making sure you're getting every last drop of performance you paid for.
First, Define Your Gaming Goals
Before you even think about hitting "add to cart" at Canada Computers or Memory Express, you need to know what you're building for. What's your gaming end-goal? The answer to that question steers your entire build.
Are you building a machine in Winnipeg to dominate in competitive esports games like Valorant or CS2 at 1080p? For that, a beefy CPU and a high-refresh-rate monitor are your top priorities, even more so than the GPU. The CPU is what pushes those ultra-high frame rates that give you a competitive edge.
Maybe you're dreaming of a 1440p rig to get lost in the neon-drenched streets of Cyberpunk 2077 with all the eye candy turned up. That demands a much more balanced approach, with a powerful GPU to handle the resolution and a solid CPU to keep pace.
Or perhaps you're going all-in for a 4K monster that can chew through any game on max settings without breaking a sweat. This is where high-end parts, especially the GPU, are simply non-negotiable. For instance, while a processor with a strong integrated GPU (like a Ryzen 6800H in a laptop) can handle lots of games at 1080p, you absolutely need a dedicated graphics card for high-resolution gaming.
I've seen it a hundred times: the most common mistake new builders make is blowing the budget on one flashy component and skimping on the others. A balanced build, matched to your specific resolution and the games you play, will always feel better than a lopsided one.
Building for Your Budget and Performance Target
Once you've got a goal, you can start matching components to it. Let’s map out a few sample builds to give you a feel for how this works for a Canadian gamer. Keep in mind that prices are always shifting, but these templates are a great starting point for different budgets.
Sample Builds for Canadian Gamers
The table below shows how component choices scale up based on your performance target. The entry-level build is all about smart value, the high-end build is about raw power, and the mid-range option hits that perfect sweet spot for most gamers.
| Component | Entry-Level (1080p) | Mid-Range (1440p) | High-End (4K) |
|---|---|---|---|
| CPU | AMD Ryzen 5 5600 / Intel Core i5-12400F | AMD Ryzen 5 7600X / Intel Core i5-13600K | AMD Ryzen 7 7800X3D / Intel Core i7-14700K |
| GPU | NVIDIA RTX 3060 / AMD RX 6600 | NVIDIA RTX 4070 / AMD RX 7800 XT | NVIDIA RTX 4080 Super / AMD RX 7900 XTX |
| RAM | 16 GB DDR4 3200MHz | 32 GB DDR5 6000MHz | 32 GB DDR5 6000MHz CL30 |
| Storage | 1 TB NVMe SSD | 2 TB NVMe SSD | 2 TB Gen4 NVMe SSD |
| Motherboard | B550 / B660 | B650 / Z790 | X670 / Z790 |
| PSU | 650W 80+ Bronze | 750W 80+ Gold | 850W+ 80+ Gold |
This framework really helps you see the trade-offs. Notice the jump from DDR4 to faster DDR5 RAM for mid- and high-end builds? That's not just a memory upgrade; it requires a completely different (and newer) motherboard and CPU platform to go with it. Everything has to be compatible.
Essential Compatibility Checks and Insider Tips
Speaking of compatibility, this is where you have to be detail-oriented. Seriously, do yourself a favour and use a tool like PCPartPicker. It's an absolute lifesaver for Canadian builders. It automatically checks if your chosen parts will work together, flags potential issues, and even finds the best prices from local shops.
Here are a few of the critical double-checks I always make:
- CPU and Motherboard Socket: Make sure the CPU's socket type (like AM5 for new AMD chips or LGA 1700 for recent Intel ones) physically matches the socket on your motherboard. They are not interchangeable. Period.
- RAM and Motherboard: Does the motherboard support the RAM generation (DDR4 vs. DDR5) and its rated speed? Check the motherboard's spec sheet.
- Case and Component Clearance: This is a physical check. Will that gigantic GPU actually fit inside the case you picked? Is there enough room for your CPU cooler, especially if it's a big air tower? Measure twice, buy once.
- PSU Wattage: Use an online power supply calculator to get a rough idea of your system's total power draw. Then, choose a PSU that gives you at least 20-30% more wattage than you need. This headroom ensures stable performance and gives you room for future upgrades.
And don't forget the peripherals! A high-quality headset can make a world of difference in your gaming immersion. Something like the innovative Audeze Maxwell Wasabi Gaming Headset can completely change your audio experience.
Lastly, think about cooling. A powerful system generates a lot of heat, and that heat needs to go somewhere. The free cooler that sometimes comes with a CPU is fine for an entry-level build, but for anything mid-range or higher, a good aftermarket air cooler or an All-In-One (AIO) liquid cooler is a smart investment. To get a better handle on that decision, check out our guide comparing liquid cooling vs air cooling.
Taking the time now to properly research and match your components will save you a world of headaches later and put you on the fast track to a successful build.
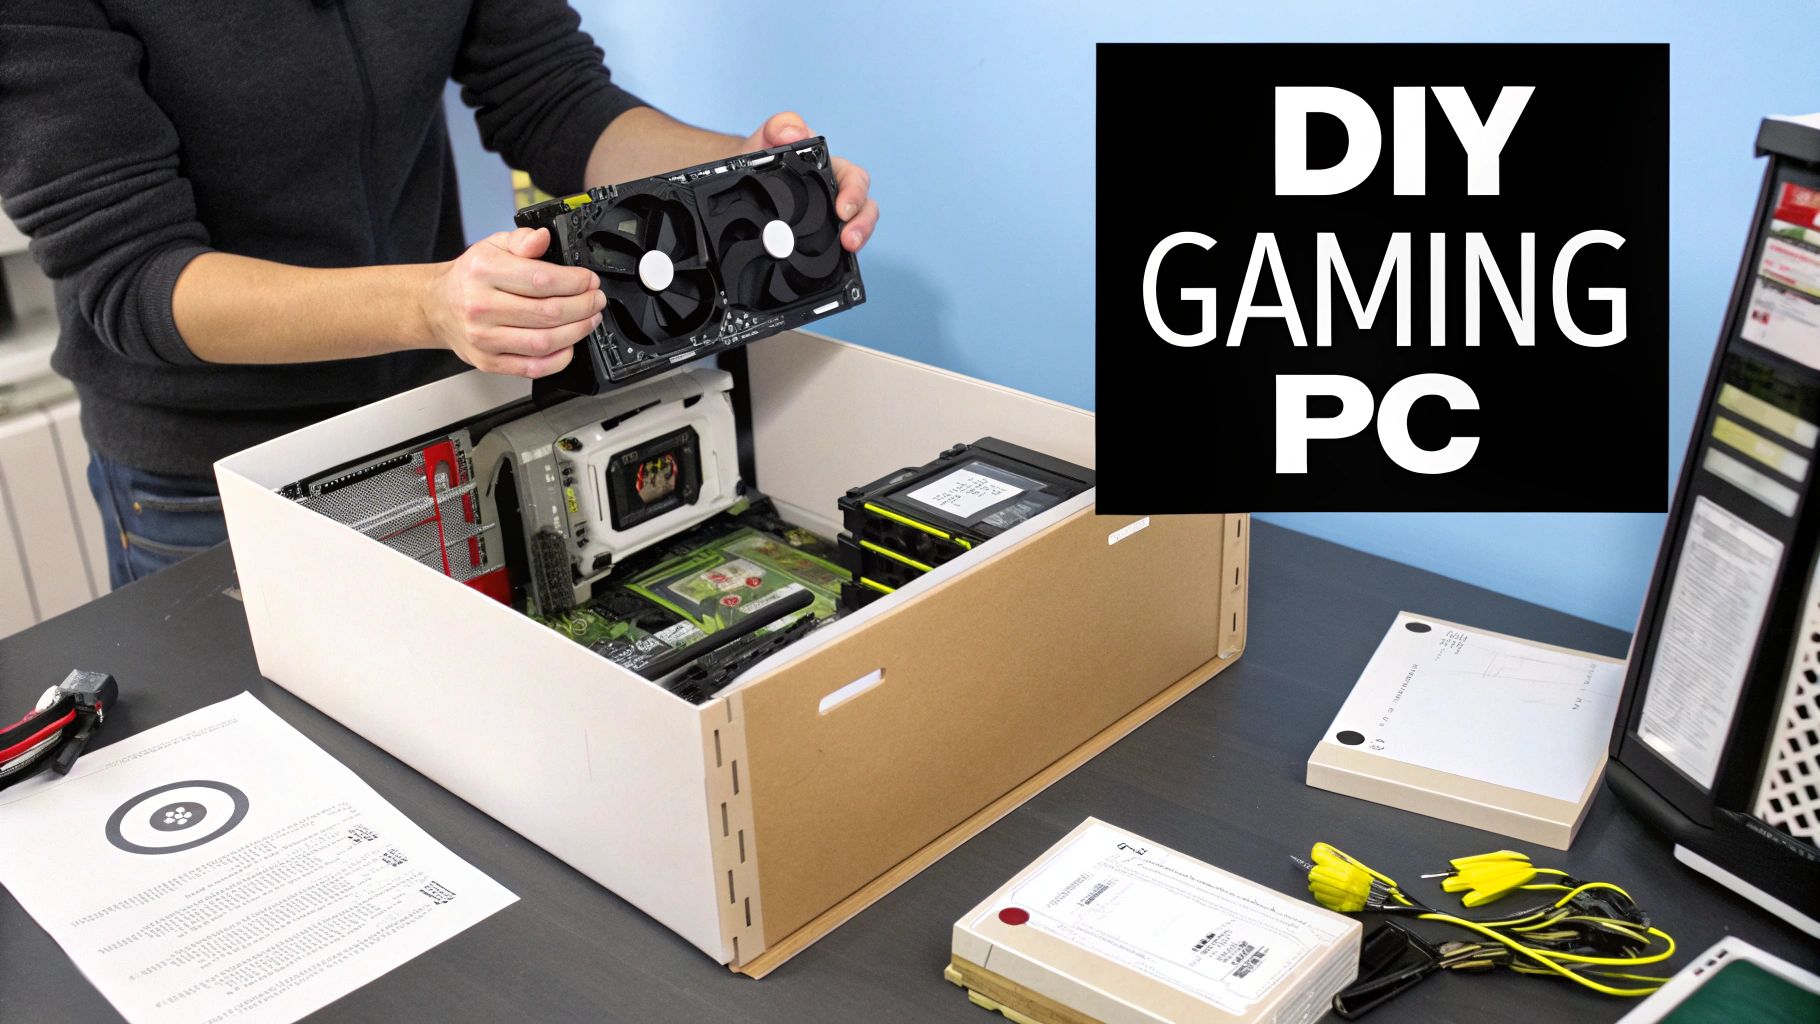
Assembling Your Gaming PC From Box to Boot
Alright, the research is done and the boxes have arrived. This is where the real fun begins—transforming that pile of components into a high-performance gaming rig. I'll walk you through the entire process, just like I would if I were right there with you in Hamilton, pointing out the common snags and sharing a few tricks I've learned over the years.
We’re going to build this thing in a logical order, starting with setting up your workspace and taking a few simple precautions. From there, we’ll get the motherboard prepped before moving everything into the case.
Preparing Your Workspace and Yourself
Before you even think about opening a single anti-static bag, let's get your build area ready. Find a clean, well-lit space with a large, non-conductive surface. A wooden dining table is perfect. The one place you absolutely want to avoid is a carpeted floor, which is a static electricity factory.
Speaking of which, electrostatic discharge (ESD) is the silent killer of PC parts. You can't see it or hear it, but one tiny zap can fry your brand-new CPU or RAM instantly. This isn't something to take lightly.
The best way to protect your gear is with proper ESD Workspace And Storage Solutions, but you can get by with some basic discipline. Before you handle any component, make it a habit to touch a grounded metal object to discharge any static you've built up. The metal frame of your PC case (while the PSU is plugged in but turned off) works great for this.
Here’s a quick look at how the main components come together, with the motherboard serving as the central nervous system.
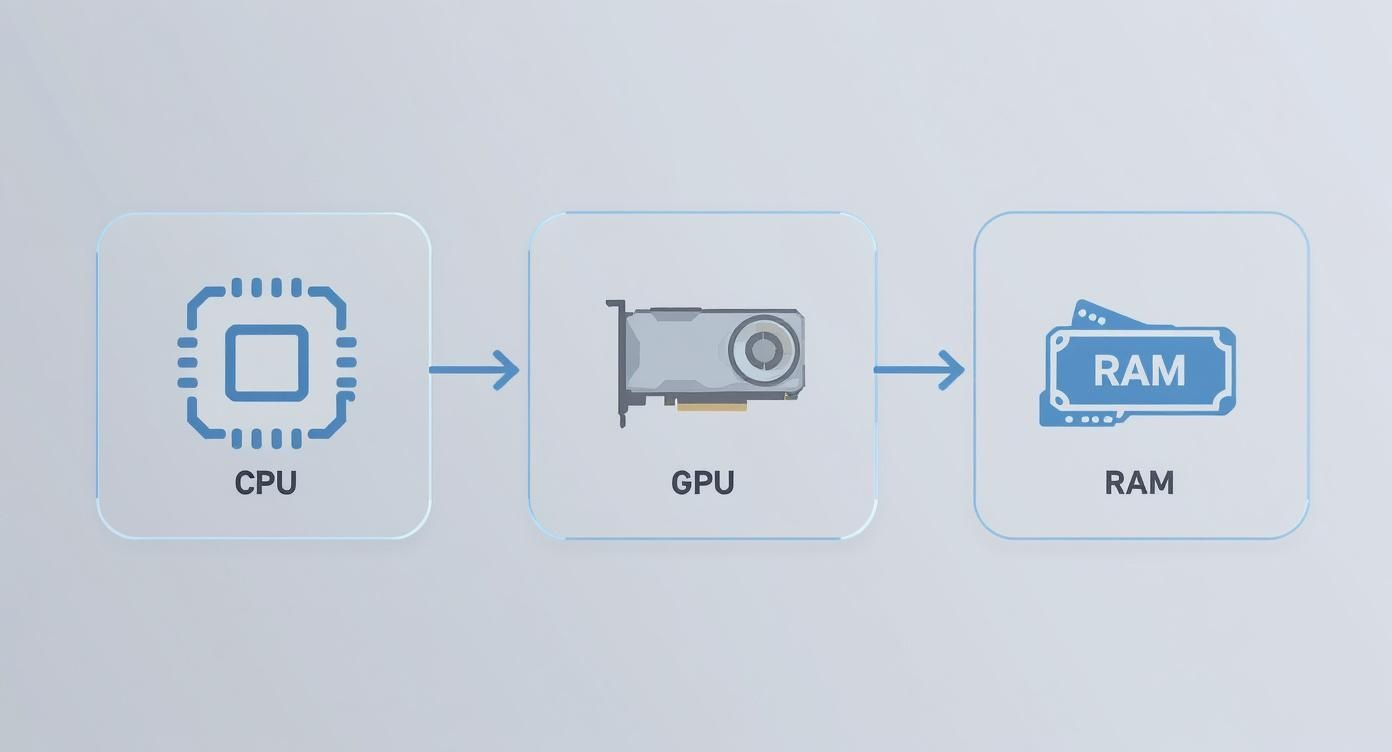
As you can see, everything plugs into the motherboard, which is why we’ll start our work there.
The Motherboard Prep Phase
Trust me, it's a whole lot easier to install the CPU and RAM while the motherboard is sitting on your workbench. Just place it on top of the anti-static bag it came in for a safe, non-conductive cushion.
First up, the CPU. This part can feel a little intimidating, but it’s actually quite simple.
- Lift the small metal retention arm on the CPU socket.
- Look for the tiny triangle on one corner of your CPU and match it with the triangle on the socket.
- Gently lower the CPU into place. Do not force it. When it's aligned properly, it will drop in with absolutely zero pressure.
- Once it's seated, lower the retention arm back down to lock it in.
Next is the RAM. Pop open the clips on the memory slots. Your motherboard manual will tell you the best slots to use for a dual-channel setup (it's usually the second and fourth slots away from the CPU). Line up the notch on the bottom of the RAM stick with the key in the slot and press down firmly on both ends. You'll hear and feel a satisfying "click" as the clips lock into place.
Installing the Brain's Cooler
With the CPU in, it’s time to mount its cooler. If you’re using the stock cooler that came with your processor, it should have a layer of thermal paste pre-applied. If you bought an aftermarket cooler, you'll need to apply the paste yourself.
A small, pea-sized dot of thermal paste right in the centre of the CPU is all you need. The pressure from the cooler will spread it out perfectly. Too much paste is a messy mistake that can actually reduce cooling performance. For a deeper dive, check out our articles on thermal paste.
One of the most common rookie mistakes is forgetting to install the motherboard's I/O shield into the case before mounting the motherboard. It's a thin metal plate that covers the ports on the back. Forgetting it means you'll have to undo a lot of work later.
Mounting the Motherboard and GPU
Now we can finally move the prepped motherboard into the case. Your first job is to install the motherboard standoffs. These are little brass or black screws that create a gap between the motherboard and the case, preventing a catastrophic short circuit. Screw them in, then carefully lower your motherboard and secure it to the standoffs.
With the motherboard in, the GPU is next. Find the top-most PCIe x16 slot (it's the longest one) and open its retention clip. You'll also need to remove one or two of the metal expansion slot covers from the back of the case. Carefully align the graphics card with the slot and press down firmly until you hear it click. Then, use screws to secure the card's bracket to the case.
Powering It All Up and Managing Cables
The last big hardware step is installing the Power Supply Unit (PSU) and plugging everything in. If you opted for a modular PSU, this part is a lot cleaner since you only use the cables you actually need.
Connect the main power cables one by one:
- 24-pin Motherboard Power: The biggest connector, it's impossible to miss.
- 8-pin CPU Power: This one usually plugs in at the top-left corner of the motherboard.
- PCIe Power for GPU: Your graphics card will need at least one 6+2 pin connector.
- SATA Power for Storage: This will power any SSDs or hard drives.
Now for the final touch: cable management. This isn't just about making your build look good; tidy cables are critical for good airflow. Route as many cables as you can behind the motherboard tray and use zip ties or velcro straps to bundle them together. This keeps the main chamber clear, allowing your fans to pull cool air over your hot components without obstruction.
Taking your time here is what separates an amateur build from a professional one. Once everything is tidy and secure, you’re ready for the moment of truth: the first boot.
Your First Boot and System Configuration
Alright, this is the moment of truth. Every part is in place, every cable is connected, and now it’s time to see your creation roar to life. The first boot always brings a mix of excitement and a little bit of nerves, but if you follow a solid process, it’s a smooth and rewarding step.
Hit the power button on your new rig and immediately start tapping the "Delete" or "F2" key. This gets you into the BIOS (or UEFI), which is essentially the control panel for your motherboard. The interface might look a bit intimidating at first, but don't worry—our first task here is just a quick look-around to make sure the system sees all your new hardware.
Find a summary screen that lists your core components. You're just confirming a few things: Is the CPU model correct? Is all your RAM showing up? If you installed two 16 GB sticks, the system should report 32 GB. If you're only seeing half that, there's a good chance one of the sticks isn't fully clicked into its slot.
Unlocking Your RAM's True Speed
Here’s a critical tweak that so many first-time builders miss. Your RAM won't run at its full advertised speed right out of the box; you actually have to give it permission. In the BIOS, hunt for a setting called XMP (Extreme Memory Profile) on Intel systems, or EXPO (Extended Profiles for Overclocking) on AMD motherboards.
You'll typically find this on the main screen or in an "overclocking" tab. All you have to do is enable it and select the profile that matches your RAM's rated speed, like 6000MHz. It's a single click that can give you a very real performance bump, especially in games.
Once you've enabled the profile, save your changes and exit the BIOS. Your PC will restart—this is perfectly normal. It’s now primed and ready for the main event: installing the operating system.
Installing Your Operating System
To get Windows installed, you’ll need a bootable USB drive. You can make one on another computer using Microsoft's free Media Creation Tool. With the USB drive ready, plug it into your new PC and turn it on. Most motherboards are smart enough to automatically boot from it.
If it boots to a black screen asking for a boot device, just restart, head back into the BIOS, and look for "Boot Order" or "Boot Priority." All you need to do is move your USB drive to the top of the list, save your settings, and exit. This forces the computer to kick off the Windows installation.
The setup process is pretty straightforward. It will walk you through picking a language, putting in your product key, and choosing where to install Windows. When it shows you a list of your storage drives, pick your main NVMe SSD (it will likely be listed as "unallocated space") and let the installer do its thing. If you run into any snags or want a more detailed guide, check out our walkthrough on how to reinstall a Windows operating system.
Finalizing Your System With Drivers
Windows is installed, and you're on the home stretch! The PC works, but it’s not truly ready for action yet. Windows uses generic, placeholder drivers to get you started, but you need the specialized software from your hardware manufacturers to unlock full performance.
First, get your new machine connected to the internet. Then, work your way through this quick driver checklist:
- Motherboard Chipset Drivers: This is a non-negotiable step for system stability. Go to your motherboard manufacturer’s website (like ASUS, MSI, or Gigabyte), find the support page for your exact model, and download the latest chipset drivers.
- GPU Drivers: For gaming, this is the big one. Go directly to the NVIDIA or AMD website and grab the newest driver package for your specific graphics card.
- Windows Updates: Finally, open up Windows Update and let it run. It will find and install any missing security patches and other important system files.
Choosing an operating system has become a bigger part of the build plan lately. For many Canadian gamers, the switch to Windows 11 has influenced how they approach a new build. It wasn't uncommon for enthusiasts in Canada to build a new PC from scratch while keeping their older Windows 10 machine running, just to make sure they had uninterrupted access to their game libraries. It’s a good reminder to always double-check CPU and motherboard compatibility to build a truly future-proof rig. You can dig deeper into these hardware market trends in this detailed analysis from Jon Peddie Research.
With those final drivers installed and everything updated, your PC is officially complete. You’ve gone from a pile of boxes to a fully configured, high-performance gaming machine. Well done.
Getting Your New Rig Game-Ready
Alright, the moment of truth has arrived. Your PC is built, it powers on, and you’ve got Windows up and running. But we're not done yet. This is where we turn that collection of parts into a well-oiled gaming machine. It's time to install the essentials, push your components to their limits, and make sure you're getting every ounce of performance you paid for.

Think of this as the shakedown cruise. You need to verify that your cooling is actually keeping things cool and that every component is pulling its weight. Skipping this step is like building a custom hot rod and never checking to see if it can handle a corner at speed.
Loading Up Your Arsenal of Software
Before you can start benchmarking, you need the right tools. Let's get your PC loaded with the software that forms the foundation of any serious gaming setup. These aren't just for playing games; they're for monitoring and maintaining the health of your new build.
Here's the essential software I always install first:
- Game Launchers: This is the obvious one. Get Steam, the Epic Games Store, GOG Galaxy, or whatever launcher holds your library. This is your portal to the games.
- Chat Apps: Gaming is social. For most of us across Canada, Discord is the non-negotiable choice for squad communication.
- The Latest Graphics Drivers: I know you might have installed them during the OS setup, but drivers are updated constantly. It's always worth a quick trip to the NVIDIA or AMD website to grab the absolute latest version.
- A Solid Web Browser: You'll need a browser like Chrome or Firefox to download everything else, so get your favourite one installed right away.
Once these basics are in place, we can move on to the really fun stuff: the tools that let you see exactly what your new PC is doing under the hood.
Keeping an Eye on Your System's Vitals
You wouldn’t drive a car without a speedometer or a temperature gauge, right? The same logic applies here. Monitoring your PC’s vital signs, especially temperatures and usage, is crucial for understanding how it performs when the pressure is on.
My go-to tool for this has always been HWMonitor. It’s a fantastic, no-nonsense utility that gives you a real-time feed of your CPU and GPU temperatures, fan speeds, and clock speeds. I recommend leaving it running on a second monitor during your first few gaming sessions just to see where your temps settle.
A crucial tip: if you see your CPU temperature creeping towards 90°C or higher during a test, that's a red flag. It often means your cooler isn't seated quite right or your case fans aren't configured for optimal airflow. Spotting this early saves you from performance throttling and could even prevent long-term damage.
For those who want to take it a step further, MSI Afterburner is essential. It does more than just monitor—it lets you set up a custom on-screen display to see your stats in-game, fine-tune your fan curves for the perfect balance of cooling and noise, and even dabble in overclocking your GPU for a free performance boost.
Let's Talk Benchmarks and Stress Tests
Benchmarking is where we get the hard data. This is how you put a number to your PC's performance and confirm that all your careful part selections paid off. You can use specialized benchmarking programs or, my preferred method, the built-in performance tests in many modern games.
A great place to start is with a graphically intensive title like Cyberpunk 2077 or Alan Wake 2. Run their built-in benchmark and pay close attention to the average frames per second (FPS). This number is now your baseline.
For anyone learning how to build a gaming PC, a valuable exercise is to compare your FPS results with online reviews for similar hardware configurations. If your rig is performing on par, you've nailed it. If your scores are lagging behind, it could point to a simple fix like a driver issue or a rogue background process eating up your resources.
Got Questions About PC Building? We've Got Answers
Jumping into the world of PC building for the first time is exciting, but it definitely brings up a lot of questions. From figuring out a budget to what to do when things go wrong, getting some solid answers beforehand can make the whole process go a lot smoother. Let's dig into some of the most common questions we hear from new builders right here in Hamilton and across Canada.
The first thing on everyone's mind is usually money. Is it really cheaper to build your own gaming PC in Canada? Most of the time, the answer is a definite yes. When you pick out your own parts, you can snag deals from retailers like Canada Computers or Newegg.ca, completely avoiding the premium that manufacturers add to pre-built systems. This strategy almost always gets you more power for your buck.
That said, the market isn't always stable. During big component shortages, like the GPU crunch we saw a few years back, pre-built PCs sometimes came out ahead because the big companies had better access to stock. It's always good to keep an eye on the current market.
Common Builder Mistakes and How Long It Really Takes
So, what are the classic rookie mistakes? Forgetting to install the motherboard's I/O shield before screwing it into the case is practically a rite of passage for first-timers. Other common slip-ups include:
- Mismatching a CPU and motherboard.
- Picking a power supply that can't handle the power draw of your components.
- Ignoring cable management, which can choke your system's airflow and cause it to run hot.
The best way to avoid these headaches is with a bit of patience and solid prep work. Always use online tools to double-check that your parts are compatible, and actually read the manuals for your motherboard and case. A slow, careful build is a successful build.
Alright, how much time should you actually block out for this? For your very first time, give yourself a full afternoon. I'd plan for about four to six hours from the moment you open the first box to when you're installing your operating system. A seasoned builder might get it done in under two hours, but there's no race here. Rushing is what causes mistakes and leads to hours of frustrating troubleshooting. A simple oversight can sometimes spiral into bigger issues; if you find your new machine is crashing, our guide on how to fix the blue screen of death can be a lifesaver.
Building your first PC is an incredibly rewarding project, but if you hit a wall or just want a pro to handle it, Klimka Computer Solutions is here to help. We offer professional custom PC build services to create your dream machine without any of the hassle. Check us out at https://klimkacomputersolutions.com to get started.
4 Responses
[…] If you're just getting started in the world of PC building in Canada, our detailed guide on how to build a gaming PC is the perfect place to learn the fundamentals before tackling your first SFF […]
[…] a more detailed look at how these parts are chosen and balanced, you might find our guide on how to build a gaming PC really […]
[…] This might seem like a minor part of a larger build, but it's a vital one. If you're getting into the nitty-gritty of putting a whole system together, you should check out our comprehensive guide on how to build a gaming PC. […]
[…] if you're learning how to build a gaming PC with the goal of pushing it to its absolute limits, starting with a higher-wattage PSU is […]