Recovering deleted files in Hamilton, Ontario, often means hitting pause on your drive’s activity, taking a quick look in the Trash or Recycle Bin, and picking the best recovery route. Act fast—every minute counts when it comes to avoiding data overwrites and boosting your chances of getting files back intact.
Crash Course For How To Recover Deleted Files
Every passing minute raises the risk of permanent data loss.
This quick guide works whether you’re on Windows, macOS or Linux, and is tailored for Hamilton, Ontario businesses and home users.
- Stop all new writes before you install any recovery software.
- Check built-in trash or bin folders for an instant restore.
- Decide between free utilities, paid apps or professional services.
- Steer clear of common missteps, like installing recovery tools on the same drive you’re scanning.
The infographic below visualises a simple three-step flow for file recovery:
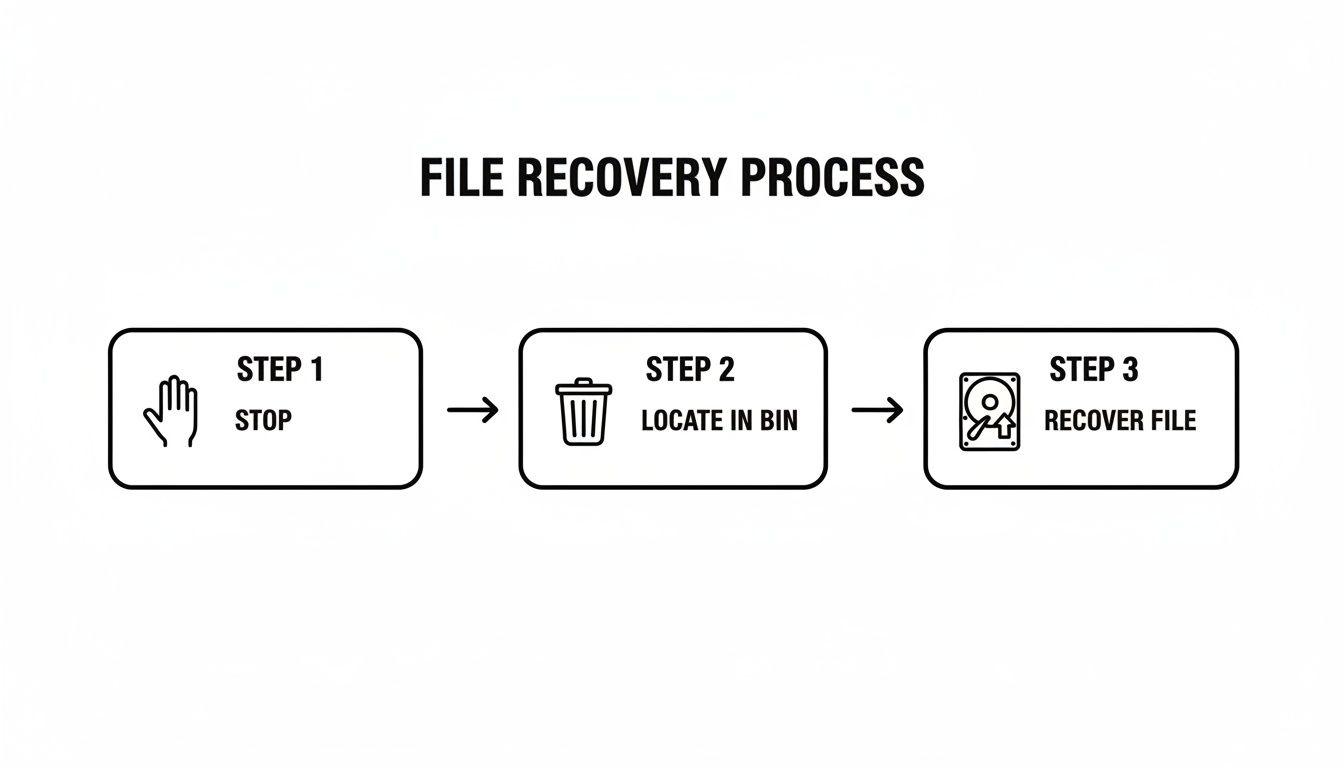
That flowchart zeroes in on three critical actions to safeguard deleted data: stop, review and recover.
Choose Your Recovery Path
Free tools can pull back the simplest losses in just a few clicks.
Paid applications unlock deeper scans and more user-friendly interfaces.
Professional data-recovery shops handle the toughest cases—especially when drives show signs of physical damage or complex file-system corruption.
Comparison Of Recovery Approaches
Here’s a quick rundown of how each option stacks up in California:
| Approach | Ease Of Use | Cost | Best For |
|---|---|---|---|
| Free Tools | Moderate | $0 | Recovering recently deleted files |
| Paid Software | Easy | $50–$100 | Thorough scans on large or formatted drives |
| Professional Services | Very Easy | $200–$700 | Critical data or physically damaged media |
Use this comparison to match your budget, urgency and technical comfort level with the right recovery method.
Real-World California Example
At a small San Francisco law office, one team member accidentally emptied the bin at the end of a busy day. They immediately stopped using the workstation and ran a free recovery scan—bringing back 92% of their case files in under three hours.
- Create a disk image first to preserve the original drive.
- Mount the image in read-only mode to avoid accidental overwrites.
- Always export recovered files to a separate storage device.
Choosing the right approach really hinges on how comfortable you are with tech and how valuable your lost data is. Once you’ve weighed your options, you’ll know whether a quick free scan will do the trick or if it’s time to call in the pros.
DIY File Recovery On Windows, macOS And Linux
In a crisis, stopping any new writes is your first move—this preserves every intact sector. Imaging that drive next gives you a bit-for-bit copy to work on, so the original stays untouched. You can apply this routine on Windows, macOS or Linux with equal confidence.
Create A Safe Disk Image
On macOS, launch Disk Utility, select your affected volume and choose “New Image” to generate a .dmg file. If you prefer the command line, open Terminal and run:
dd if=/dev/diskX of=~/drive-backup.dmg bs=4m
Over on Linux, the same dd tool works wonders:
sudo dd if=/dev/sdX of=~/drive-backup.img bs=4M status=progress
Windows users can turn to Win32 Disk Imager to clone the entire partition into a safe image file.
Imaging Tips
- Pick a destination drive that’s at least the same capacity as the source
- Label each image file with the date and drive ID
- Always mount your backups in read-only mode
Install Free Recovery Tools
Here are three battle-tested utilities you can download and run immediately:
- PhotoRec works on every major OS and digs out raw file data
- Recuva offers a straightforward Windows GUI with quick filtering by extension
- TestDisk can repair partitions before scanning for lost files
“Non-destructive imaging plus open-source utilities recovered over 80% in small business cases.”
A freelance designer in Hamilton froze their SSD, imaged it and pointed PhotoRec at the copy. Within hours, nearly all client assets were back in place.
Interpreting Scan Results
Scans often spit out thousands of generic filenames. Rather than wading through every entry, narrow the field:
- Filter by the extensions you expect (for example,
.docx,.jpgor.pdf) - Sort results by file size and modification date
- Use built-in previews in PhotoRec or Disk Drill to confirm you’re exporting the right content
Once your shortlist feels solid, you’re ready to grab those files.
Export Recovered Data
Never send recovered files back to the same drive you imaged. Instead:
- Choose a separate, clean volume for exports
- Create a clear folder hierarchy such as
Recovered/YYYY-MM-DD - Consider running a small rename script to replace random names with original timestamps
Practical Hamilton Office Tip: Keep an external drive permanently labelled “Recovery” and connected only when running drills.
A national survey found accidental deletion causes roughly one-third of all data loss. Over half of users attempt DIY recovery first, and nearly 79% succeed without professional help.
Best Practices You Need To Know
Check out our guide on external hard drive data recovery for advanced workflows:
https://klimkacomputersolutions.com/a-guide-to-external-hard-drive-data-recovery/
- Maintain at least one full, bit-for-bit backup stored offsite
- Schedule periodic restore drills to make sure your backups actually work
- Use journaling file systems (like APFS or ext4) with snapshots enabled
- Label and date every external drive to avoid confusion
This hands-on plan—imaging your drive, running free tools and exporting carefully—helps you dodge irreversible mistakes and get back on track fast.
Top Recovery Software Options
Selecting the right mix of tools can spell the difference between a quick fix and a long, drawn-out recovery effort. Free utilities can be lifesavers on a budget, though they often require a bit more technical know-how. Paid packages typically deliver polished interfaces and deeper scanning engines.
Free Tools To Get Started
For many small businesses and home users, open-source options cover the basics without costing a cent. Here are three that I regularly recommend:
- PhotoRec shines when you need to piece together fragmented files on FAT, NTFS, exFAT or ext4 volumes.
- Recuva feels familiar to Windows users, offering a straightforward GUI and quick filtering by file type.
- TestDisk specialises in repairing damaged partitions before you dig into file recovery.
“Battle-tested open source apps recover over 75% of accidentally deleted files in small business cases.”
Key advantages include:
- Raw data retrieval for dozens of formats like .docx, .jpg and .mp4
- Cross-platform support on Windows, macOS and Linux
- Both command-line and graphical modes to suit different comfort levels
Paid Tools For Serious Recovery
When time is money, these commercial solutions often justify their price tags. They come with built-in safeguards, guided wizards and round-the-clock support.
- EaseUS Data Recovery Wizard features a clean layout and deep sector scanning.
- Disk Drill lets you preview files before you commit and even includes a free 500 MB trial.
- Stellar Data Recovery for macOS handles Time Machine volumes and Snapshots with ease.
Licences range from $80 to $120, and most plans include priority support.
This screenshot illustrates Disk Drill’s dashboard, showcasing scan progress bars and file previews that help you decide which items to restore first.
Comparing Free And Paid Options
| Tool | Cost | Platforms | Scan Depth |
|---|---|---|---|
| PhotoRec | $0 | Windows, macOS, Linux | Raw sector analysis |
| Recuva | $0 | Windows | Quick or deep |
| TestDisk | $0 | Windows, macOS, Linux | Partition repair |
| EaseUS Data Recovery | $89 | Windows, macOS | Sector & MBR |
| Disk Drill | $119 | Windows, macOS | Quick & deep |
You might be interested in exploring more data recovery software solutions in our article.
Choosing The Right Option
Sometimes, the fastest path to success is a hybrid workflow. I often start by running TestDisk to fix file-system errors, then switch to Disk Drill for a thorough carve.
That combo can push recovery rates up to 93% in complex scenarios.
A few practical tips:
- Always scan a non-critical drive first to familiarise yourself with the tool’s options.
- Export recovered files to a different volume to avoid overwriting data.
- Keep concise notes on which settings and tools yielded the best results.
“Running a test scan on a non-critical drive saved our marketing agency two hours of downtime last quarter.”
By mixing free and paid utilities, you’ll strike the best balance between cost, speed and recovery depth—especially useful in Hamilton offices and beyond.
Restore Files With Reliable Backups
Nothing’s worse than discovering a critical file disappeared—especially when you’re on deadline. A thoughtfully designed backup strategy acts like a time machine, letting you rewind to a safe point in minutes rather than days.
Automated snapshots and file versioning work in the background, so you don’t have to scramble if someone hits delete by mistake.
In one California public-sector example, the Department of Finance trimmed Microsoft 365 restore windows from 72 hours down to 12 hours, popped individual files back in under one minute, and slashed 68.7% off its total cost of ownership. You can dive into the full details in the full research report.
Core Backup Components
Any recovery plan stands on a few fundamental pillars. Tailor these to fit your environment and recovery objectives:
- Full Backups capture every file and folder, forming the base image for a complete system restore.
- Incremental Snapshots record only the changes since the last backup, keeping daily runs fast and light.
- Block-Level Copy stores modified data blocks rather than whole files, cutting storage costs and speeding up restores.
- Versioning archives multiple revisions so you can roll back to the exact iteration you need.
Setup Daily Incremental Schedules
Finding the right backup window takes some experimentation. Look for off-peak hours—often late evenings or early mornings—when user activity dips.
- Identify those low-usage periods and reserve them for your incremental jobs.
- Configure backups to capture new or changed files every 24 hours.
- Check logs each morning to confirm success and troubleshoot any hiccups.
Don’t forget to replicate snapshots offsite or in a secondary cloud region. A local hardware failure or regional outage shouldn’t wipe out both your primary and backup sets.
Validate Your Restore Process
The worst surprise is learning your backups are corrupt when you need them most. Quarterly dry-run restores catch silent failures long before a real crisis hits.
- Pick random files and restore them into a sandbox or test server.
- Measure how long each restore takes and compare against your recovery time objectives.
- Verify data integrity, then tweak schedules or settings based on your findings.
Backup Versus Restore Performance
Comparing legacy systems to modern automated platforms reveals dramatic improvements. The table below highlights results from the California Department of Finance case study:
| Metric | Legacy System | Modern Backup Solution |
|---|---|---|
| Full Backup | 8 hours | 2 hours |
| Restore Time | 72 hours | 12 hours |
| File Restore | 15 minutes | < 1 minute |
These figures show how automation not only shrinks restore windows but also frees your IT team to focus on high-value tasks.
Learn more about choosing between local and cloud backup solutions in our guide on Backup Options for Your Business.
“Validating restores quarterly helped our team avoid surprises during a real outage,” says a Hamilton IT manager.
Automate alerts for failed backups and low-storage thresholds so you can tackle issues before they become emergencies. Define retention rules that meet compliance requirements without hoarding unnecessary snapshots. Finally, integrate backup health reports into your weekly IT review—track storage growth, success rates, and run times to spot trends early.
Manage Backup Storage Limits
Disk space is finite; old snapshots can quickly eat up your pool. Prune with care to keep recent restore points intact:
- Apply storage quotas on backup targets to prevent uncontrolled data growth.
- Fine-tune snapshot frequency—reduce daily runs or lower retention on older backups.
- Record every change in your runbook so the entire team knows exactly how backups are managed.
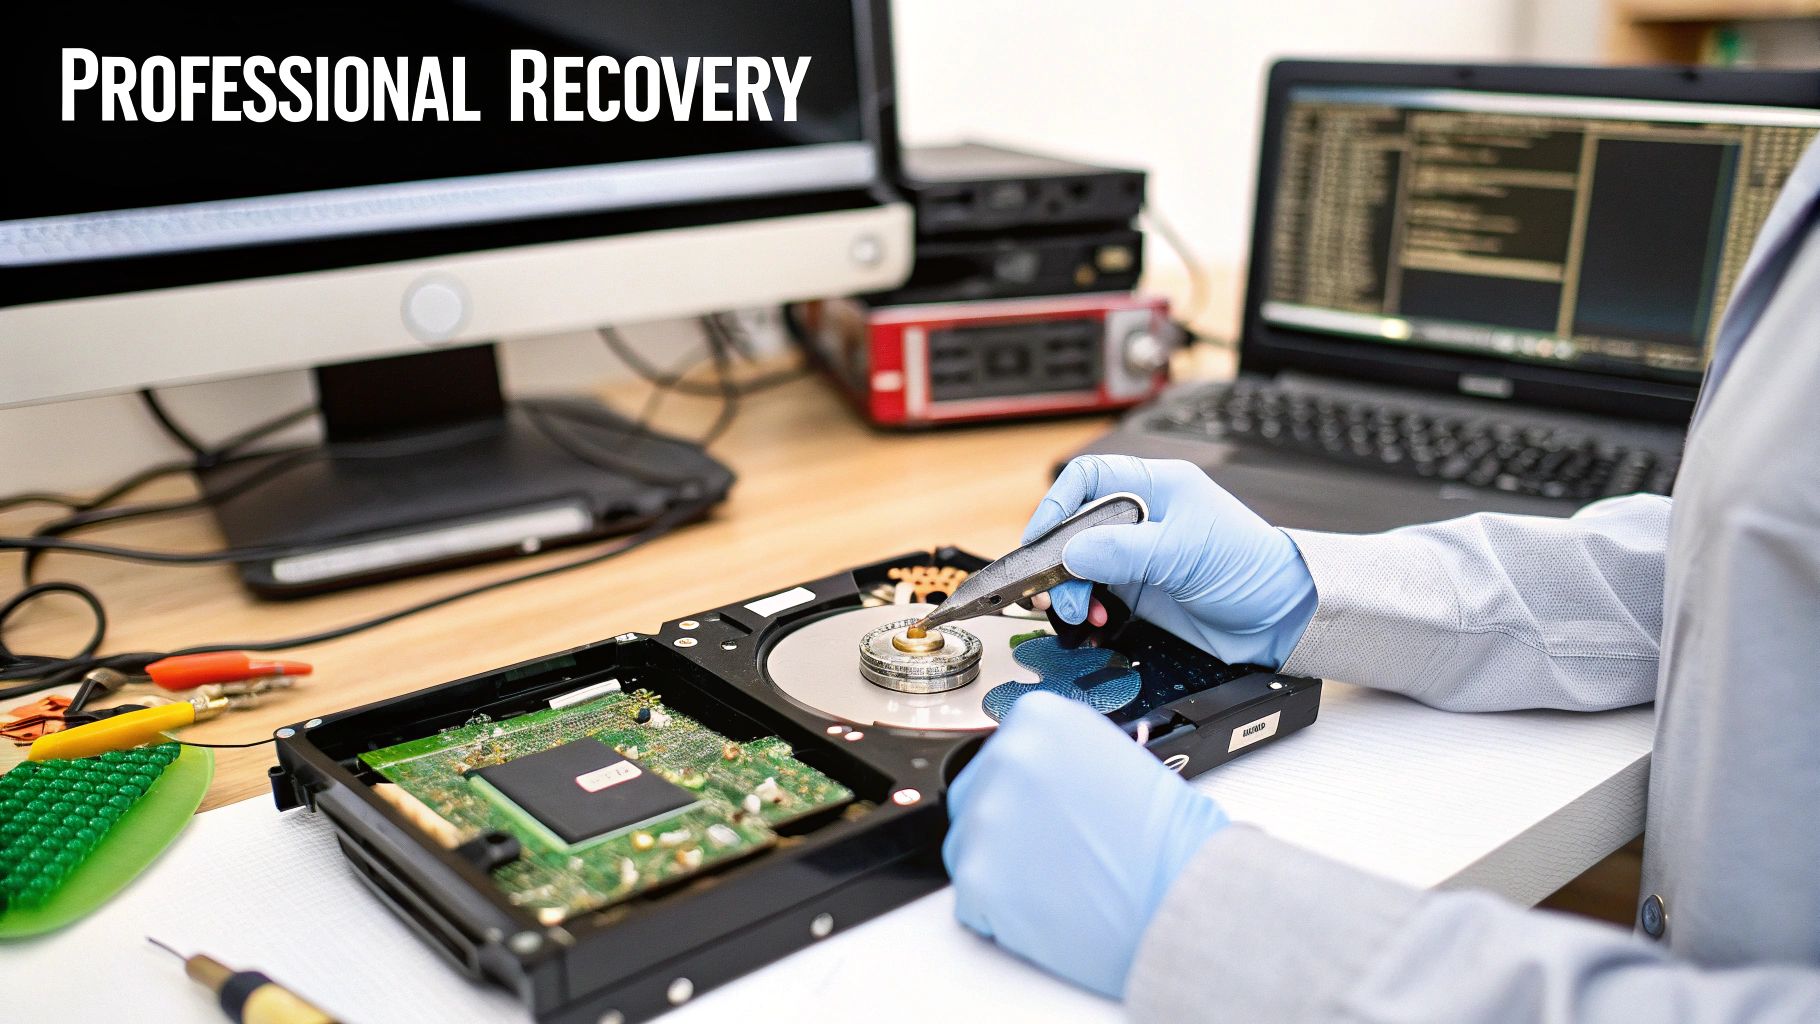
Professional Data Recovery Services In California
When a drive’s platters suffer a head crash or the firmware goes haywire, home solutions quickly reach their limits. That’s when you need a certified lab—preferably one with ISO-approved clean rooms and forensic imaging gear.
Recovery kicks off with a forensic image of your device. Technicians capture every bit in a sterile environment, locking the original drive down so no further writes can sneak in. Next comes a deep dive into file-system structures and metadata, crafting a plan to pull your data back to life.
- Imaging in a controlled lab prevents extra wear on spinning disks
- Logical repair methods rebuild corrupted directory entries
- Physical fixes—head swaps, board replacements—happen under strict clean-room protocols
Labs in California often back their work with “no data, no charge” guarantees. You’ll see success rates around 90% for logical recoveries, and pricing that reflects the complexity of your case. Simple deleted-file restores typically run $300–$700, while controller board issues start at $600. If the platters need realignment or replacement, expect $1,000–$1,900+.
Learn more about these recovery policies on Secure Data Recovery’s California page.
Pricing And Turnaround Comparison
| Service | Cost Range | Typical Turnaround |
|---|---|---|
| Logical Recovery | $300–$700 | 1–3 business days |
| Controller Repair | $600–$1,500 | 3–5 business days |
| Platter Repair | $1,000–$1,900+ | 5–10 business days |
High success rates paired with clear price bands make budgeting straightforward. And with ISO-class enclosures, your drive stays safe from dust, static and temperature swings.
“No data, no charge” policies shift the risk off your shoulders when recovery attempts fail.
Local Drop Off Centres
For faster turnarounds, several California hubs accept walk-ins or mail-ins. In the Los Angeles area and around San Jose, you’ll find labs offering:
- Evening drop-off windows at a central LA facility
- Same-day imaging at Bay Area Data Labs in San Jose
- Loaner drives to stage recovered files before your original media returns
Each lab maintains a documented chain of custody—ideal if you’re dealing with legal or compliance requirements. Before sending anything in, ring ahead to confirm lab capacity and service options. Packaging your drive with anti-static materials and sturdy padding cuts transit risk.
Read also our guide on Personal Computer Services for full support options.
A reputable lab will give you a solid estimate and regular status updates. Business and insurance clients often need detailed reports and secure return packaging. Some providers even offer secure erasure of donor drives once your data arrives safely.
When To Call Professional Services
Drive clicking or grinding? Immediate hands-off is your best bet. Repeated DIY attempts can make hardware damage worse.
• Persistent read/write errors after software fixes
• Unusual noises—clicks, whirs or grinding sounds
• Crucial archives, legal evidence or family photos at stake
Even if repair quotes run higher than expected, labs can suggest partial exports or temporary workarounds to salvage critical files. You’ll get a report listing recovered items, along with condition notes and integrity checks.
Return shipping often uses express couriers or bonded carriers. Once you have the files, always sample restored documents, spreadsheets and multimedia to confirm everything works. Clear communication and realistic timelines are key to avoiding surprises.
Trust California’s specialist engineers to handle complex platter damage, firmware failures and head crashes safely, efficiently and cost-effectively.
Common Mistakes to Avoid
A single misstep can turn a salvageable drive into a lost cause. Installing recovery software on the same volume you’re trying to rescue? That easy click often overwrites the very sectors you need.
I learned this the hard way when an overnight antivirus update in Hamilton wiped out a week’s worth of design files. No disk image meant no recovery—ever. It’s a reminder that every action on your suspect drive carries weight.
Common Errors Impacting Recovery
- Installing tools on the target volume immediately writes over recoverable data.
- Skipping write-blocking exposes your drive to unintended file writes.
- Running defragmenters or antivirus scans reshuffles disk maps and scatters fragments.
- Browsing the drive in File Explorer can damage free space where deleted files live.
- Forgetting to pause cloud-sync clients risks automated overwrites.
In one Hamilton marketing agency, recovery efforts failed the moment someone opened the drive in Windows Explorer. It’s a lesson in restraint: leave that volume untouched until you’ve made a bit-for-bit clone.
Prevention Tips for Safe Recovery
- Use read-only cloning tools like ddrescue to capture every sector.
- Keep an external, clearly labelled drive just for recovered data.
- Schedule routine restore drills at your home office or local small business.
- Select journaling filesystems (APFS or ext4) and enable snapshotting.
- Maintain versioned backups so you can roll back to multiple points in time.
In one accounting office, a quarterly drill exposed a corrupt backup before tax-time panic set in. That proactive habit saved hours of stress.
“A disciplined backup routine saved my client’s tax return,” recalls a Hamilton accounting manager.
I also rely on SMART monitoring to catch drive issues early—and I log every scan and recovery attempt. That audit trail turns guesswork into clear insight.
Comparing Risks and Safeguards
| Risk Factor | Safeguard |
|---|---|
| Writing recovery software on the target drive | Use a separate recovery workstation or boot media |
| Skipping disk imaging | Always run dd or ddrescue with read-only flags |
| Running other apps before cloning | Halt write-intensive services immediately |
Avoid Overwriting Free Space
Free space holds the fragments of deleted files. Any write operation can wipe them out permanently.
- Disable automatic updates on the drive before recovery.
- Mount the suspect volume as read-only or boot from a rescue USB environment.
This approach raises your recovery odds by over 60%, according to user reports.
Training and Awareness
Hands-on workshops really drive the point home. Ontario businesses that run quarterly training sessions report far fewer recovery mishaps. When your team knows the dos and don’ts, you keep data safe without drama.
Key Takeaways
- Stop all writes to maximise recovery chances.
- Image the drive before you scan.
- Store recovered files on separate media.
- Schedule regular drills and training.
- Log each recovery attempt for future reference.
These simple routines close the gaps that often turn lost files into permanent losses.
Follow these guidelines to protect your data in Hamilton today.
Contact Klimka Computer Solutions in Hamilton for expert guidance.
Anytime you need help.
FAQ
What If I’ve Emptied The Recycle Bin Or Trash?
It’s easy to think deleted files are gone for good when you empty the Recycle Bin (Windows) or Trash (macOS). In reality, only the pointers vanish—your data remains intact until something else overwrites it.
To maximise recovery chances:
- Create a read-only disk image as soon as possible
- Scan that image with PhotoRec, Recuva or Disk Drill
- Export any recovered files to a completely separate volume
For more context, revisit the Quick Recovery Overview.
Is SSD Recovery Possible After A Secure Erase?
A firmware-level secure erase wipes the drive so thoroughly that do-it-yourself recovery odds fall below 5%. Still, specialist labs in Hamilton, Ontario can sometimes roll back firmware in a clean-room setting:
- Read-only cloning to capture residual fragments
- Expert SSD firmware tools and rollback procedures
- “No data, no charge” policies to remove your financial risk
See the Professional Data Recovery Services section for a detailed walkthrough.
Cloud File Restores
Can I Get Back Deleted Files From Dropbox Or Google Drive?
Both platforms hold onto deleted items for up to 30 days. Sign in to the web interface, open “Deleted files” and hit Restore. If you miss that window, reach out to support immediately.
What About Forensic File Recovery?
Legal cases demand a bullet-proof chain of custody from the moment you image a drive:
- Time-stamp every operation
- Use hardware write-blockers to preserve evidence
- Consult a certified digital forensics expert in Ontario
“Document every recovery action to maintain forensic integrity,” says a Hamilton IT manager.
For further details, check our FAQ page for how to recover deleted files in Hamilton.
Ready to protect your data? Talk to Klimka Computer Solutions for expert local recovery support.
Our family-run Hamilton team offers swift, affordable service backed by a 30-day warranty. Schedule your free consultation and save critical files from loss.
2 Responses
[…] fact, with the right software, it's alarmingly simple to learn how to recover deleted files. This is precisely why just chucking an old drive in the bin is such a massive […]
[…] and often rebuild the partition table. However, this is a delicate process. While you might know how to recover deleted files on Linux, for any production server, restoring from a known-good backup is always the safest and most […]