Knowing how to reinstall Windows is one of the most useful skills a PC owner can have. It all boils down to a few core stages: backing up your data, creating a bootable USB drive, and then running the installation wizard. This process completely formats your main drive, giving your computer a true fresh start. For those in Hamilton and the surrounding areas, this guide will help you tackle the process like a pro.
Deciding If a Fresh Windows Install Is for You
Before you dive in, let’s make sure a full reinstallation is really what you need. A clean install is the ultimate troubleshooting tool, but it's also the most disruptive. Think of it as demolishing your house to fix a leaky faucet—sometimes, it’s necessary, but you want to be sure first.
If your computer is just feeling a little sluggish, a full reinstall is probably overkill. But if your PC is crippled by persistent problems that no amount of basic maintenance seems to fix, then wiping the slate clean might be the perfect solution. It's a go-to fix for tech users across the Greater Hamilton Area who want to get their system running like new again.
When a Reinstall Makes Sense
You should only consider a full reinstallation when you're dealing with serious, recurring issues. We’re not talking about minor quirks; we’re talking about problems that stop you from getting things done.
Here are a few tell-tale signs that it’s time to start fresh:
- Stubborn Malware or Viruses: You've tried every antivirus tool you can find, but you're still getting weird pop-ups or noticing suspicious activity. Some malware burrows so deep into the operating system that only a complete wipe will get rid of it for good.
- Constant System Crashes: If the infamous Blue Screen of Death (BSOD) has become a regular visitor or your apps are crashing for no reason, you likely have corrupted system files that simple repairs can't touch.
- Unfixable Sluggishness: Your PC takes forever to boot, and programs feel like they’re wading through molasses. If you’ve already tried clearing out temp files and uninstalling old software with no luck, it’s time for a reset.
- Preparing to Sell or Donate: Giving your computer to someone else? A clean install is non-negotiable. It's the only way to be absolutely certain all your personal data has been securely removed.
A clean install isn't just a repair; it's a performance overhaul. It gets rid of years of accumulated software junk, fragmented files, and registry errors, often making an older PC in Hamilton feel surprisingly fast again.
Clean Install vs. System Reset
It's important to know the difference between a "clean install" and the "Reset this PC" feature built into Windows. A system reset is the simpler, faster option. It reinstalls Windows using files already stored on your hard drive and even gives you the choice to keep your personal files.
A clean install is the more powerful, comprehensive approach. You use external media (like a USB stick) to completely format the drive and install a brand-new, untouched copy of Windows. This removes everything—including hidden corrupted files or deep-rooted malware that a simple reset might miss. Many of the most frustrating PC problems, often detailed on professional pages for Windows repair in Hamilton, are best solved with a true clean install.
Safeguarding Your Files Before You Begin
Let's be clear: diving into a fresh Windows installation without a proper backup is a recipe for disaster. A clean install wipes your main drive completely—it’s a digital clean slate, which is great, but it takes every document, photo, and file down with it.
This step is non-negotiable. And I’m not just talking about dragging your 'Documents' folder onto a USB stick and calling it a day. A real, reliable backup needs a bit more thought. The best strategy, from my experience helping clients in Hamilton, is a two-pronged approach: use cloud storage for your essential, everyday files and an external hard drive for a complete, physical copy. This way, if one method fails, you've always got a fallback.
Building Your Backup Arsenal
Your first line of defence should be a cloud service you trust. Platforms like OneDrive, Google Drive, or Dropbox are fantastic because they can sync your most important files automatically. You can, for instance, set up OneDrive to mirror your Desktop, Documents, and Pictures folders in real-time. It’s a set-it-and-forget-it way to keep an accessible, off-site copy of your critical data.
Next up is your physical backup. For this, you’ll want an external hard drive or a high-capacity USB flash drive. This is where you'll park the heavy stuff—large video projects, your entire photo library, and full system images. Whether you're a home user in Ancaster or running a small business in downtown Hamilton, a solid backup plan is just good practice. We cover this in more detail on our page about professional data backup solutions.
The Often-Forgotten Data Checklist
Here's where a lot of people trip up. Just backing up your main folders isn't enough. So many crucial settings and files are tucked away in places you wouldn't think to look. Forgetting them can turn the simple task of setting up your new system into a major headache.
Make sure you've covered all your bases with this checklist:
- Browser Bookmarks and Passwords: Thankfully, modern browsers like Chrome and Firefox make this easy. Just log into your browser account and make sure everything is synced up before you start.
- Application Settings: A ton of programs stash their settings in the hidden
AppDatafolder. To find it, press the Windows Key + R, type%appdata%, and hit Enter. It’s worth digging through theRoamingandLocalfolders for anything you can’t live without. - Game Saves: This one’s for the gamers. While services like Steam have cloud saves, many older or indie games save your progress locally. You'll often find these files in your 'Documents' folder or buried within
AppData. - Email Files: If you use a desktop client like Outlook, your emails are probably stored in a
.PSTor.OSTfile. You’ll definitely want to export or back these up. - Product Keys: Make a list of all the licence keys for software you've paid for, like Microsoft Office or the Adobe Creative Suite. You'll need them to reactivate everything on your new installation.
Pro Tip: I always create a dedicated folder on my external drive and name it something like "Windows Backup [Date]". Inside, I make subfolders for "Documents," "Photos," "AppData," and "Product Keys." A little organization now will save you a world of pain later when you’re trying to find everything.
Putting in this prep work is just part of the process. The need to reinstall Windows is common, especially in tech-heavy regions like Southern Ontario. The platform's market share was once a staggering 96.10% globally, and its massive software compatibility means it's still the go-to for millions. For many of us, a reinstall is just routine maintenance. Taking these extra steps ensures your digital life is packed and ready to move into its new, clean home.
2. Creating Your Windows Installation Media
With your important files safely tucked away, it's time to create the tool for the job: a bootable Windows installation drive. Think of it as crafting the master key that will unlock a fresh start for your computer.
You'll need a blank USB flash drive with at least 8GB of space and a decent internet connection. We’re going to use the official Microsoft Media Creation Tool for this. It's a free, handy utility that grabs the latest version of Windows directly from Microsoft and sets up your USB drive perfectly.
Getting the USB Drive Ready
First things first, head over to Microsoft's website and download the Media Creation Tool. Once it's on your computer, run the program and accept the licence terms. You'll see two choices. Make sure you pick the one that says, "Create installation media (USB flash drive, DVD, or ISO file) for another PC."
This is the critical step. The other option, "Upgrade this PC now," just installs Windows over your existing setup, which is exactly what we're trying to avoid with a clean install. For anyone looking for hands-on help, our team provides expert PC and Windows upgrades in Hamilton, making sure every choice is the right one for your setup.
Next, you'll be asked about language, architecture, and edition. For most situations, leaving the "Use the recommended options for this PC" box ticked is fine. If you’re making this USB for a completely different computer, however, you'll want to uncheck it and pick the right settings yourself.
One common trip-up is picking the wrong Windows edition. Double-check that the version you choose (Home or Pro) matches the licence that's linked to your computer. A mismatch here will cause activation problems down the line.
Choosing Your Windows Version: Windows 10 vs. Windows 11
The Media Creation Tool will let you choose which version to install, which brings up a common question: stick with the familiar or move to the latest and greatest? While many users are jumping to Windows 11—which now holds about 49.05% of the global market according to StatCounter—Windows 10 remains a rock-solid choice, especially for older hardware.
Here's a quick rundown to help you decide.
Choosing Your Windows Version Windows 10 vs Windows 11
| Feature | Windows 10 | Windows 11 |
|---|---|---|
| System Requirements | Less demanding; runs well on older PCs. | Stricter; requires TPM 2.0 and a modern CPU. |
| User Interface | Classic Start Menu and taskbar. Familiar and functional. | Centred Start Menu and taskbar with a modern, sleek design. |
| Performance | Stable and highly optimized over many years. | Optimized for newer hardware, with features like DirectStorage for gaming. |
| Support Lifecycle | Support ends in October 2025. | The current version, receiving ongoing feature updates. |
Ultimately, if your computer can handle it, Windows 11 offers a fresh experience and the latest features. If you'd rather stick with what you know or your hardware is a few years old, Windows 10 is still a fantastic and reliable option. Local Hamilton tech experts can also offer advice based on your specific needs.
Once you’ve made your choice in the Media Creation Tool, select "USB flash drive" as the media type and pick your connected drive from the list. The tool will take it from here, downloading the Windows files and making your USB bootable. This process can take a while depending on your internet connection, so it's a perfect opportunity to step away and grab a coffee.
When it's all done, you’ll have a ready-to-go Windows installation drive.
Time to Install: Navigating the Windows Setup
You've got your bootable USB drive ready to go, which means it’s time for the main event. We're about to walk your computer through the process of installing a completely fresh version of Windows. It might sound a bit intimidating, but honestly, it’s mostly just clicking through a series of simple prompts.
The very first thing we need to do is tell your computer to start up from the USB drive you just created, not from its internal hard drive. To do this, we need to pop into your PC's BIOS or UEFI—this is the basic software that gets everything running before Windows even starts to load.
Getting Your PC to Boot from the USB Drive
To get into the BIOS/UEFI, you'll need to restart your computer and immediately start tapping a specific key on your keyboard. The exact key varies by manufacturer, but it's almost always one of these:
- F2
- F10
- F12
- Delete
You have to be quick about it, as you only have a few seconds during startup to press the key. Once you're in, look for a menu labelled "Boot" or "Boot Order." From there, you just need to change the boot priority so your USB drive is at the top of the list. Save your changes and exit. Your computer will restart and, this time, it will load directly into the Windows installation screen.
This handy visual breaks down the flow of getting the tool, setting up your USB, and creating the installation media.
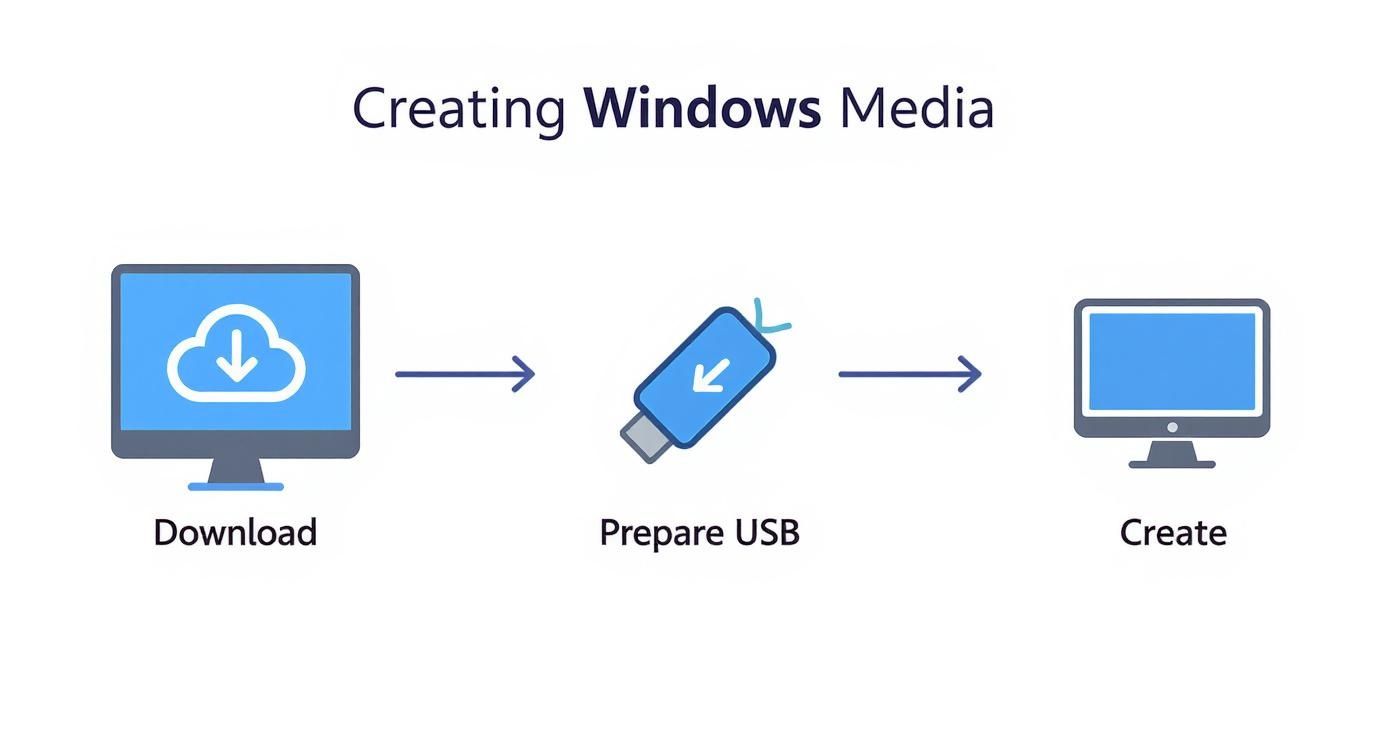
Following this process is the key to creating the installation media correctly, which sets you up for a hassle-free reinstall.
Walking Through the Setup Screens
Once your machine boots from the USB, the Windows Setup wizard will appear. The first couple of screens are a breeze; you’ll just confirm your preferred language, time zone, and keyboard layout. Click "Next," and you're on your way.
You'll quickly come to a screen asking for your Windows product key. If you have it, great—type it in. But if your computer came with Windows already on it, you probably have a digital licence that's linked directly to your hardware. If that's the case, you can just click "I don't have a product key." Windows is smart enough to recognize your computer and will activate automatically once the installation is done and you're back online.
Wiping the Slate Clean: Managing Disk Partitions
This next step is the most critical part of getting a truly clean installation: dealing with disk partitions. The installer will show you a list of all the existing partitions on your hard drive or SSD. To do this right, we need to get rid of the old ones.
A rookie mistake I see all the time in Hamilton and beyond is people trying to install Windows over an old partition without formatting it. This often leaves a
Windows.oldfolder and fails to clear out the very junk that was causing performance issues. We want a completely fresh start.
Here's the proper way to handle it:
- Look at the list and select each partition that was part of your old Windows setup. They're usually labelled with types like "Primary," "System," "MSR," or "Recovery."
- For each one, click the "Delete" button. You'll have to confirm that you're sure.
- Keep doing this until all those old partitions are gone and you're left with a single entry called "Unallocated Space."
That "Unallocated Space" is your blank canvas. Perfect. Now, just select it and click "Next." The installer takes over from here, automatically creating all the new partitions it needs and starting the file transfer.
I get it—deleting partitions can feel a bit nerve-wracking, especially if you're worried about accidental data loss or file corruption. If you're in the area and want a professional to handle the tricky parts, services for file corruption repair in Hamilton can offer that extra peace of mind.
Now, all you have to do is wait. The installer will copy files, set up features, and restart your computer a few times. Just let it do its thing. You’re well on your way to a speedy, clean Windows experience.
Finalizing Your Setup for Peak Performance
Seeing that clean, fresh Windows desktop for the first time is a fantastic feeling, but don’t close up shop just yet. The next hour or two are crucial. This is when you turn a generic installation into a secure, snappy, and personalized machine that’s ready for anything you throw at it.
Your first port of call, without exception, should be Windows Update. A fresh install is almost never current with the latest security patches. Head straight to Settings, then "Update & Security," and hit "Check for updates." Let it do its thing—downloading, installing, and probably restarting a few times. This is absolutely non-negotiable for keeping your system safe from day one.
Hunting Down Missing Drivers
Once your system is secure, it's time to make sure all your hardware is playing nicely with Windows. This is a job for Device Manager, which you can quickly pull up by right-clicking the Start button.
Keep an eye out for any devices flagged with a little yellow exclamation mark. That's Windows waving a flag, telling you it doesn't have the right driver. Think of a driver as a translator that lets the operating system speak to your graphics card, Wi-Fi adapter, or sound card.
- Graphics Card: Go directly to the source. Head to the NVIDIA, AMD, or Intel website for the latest official driver. This is a must for smooth gaming and video playback.
- Chipset Drivers: Next, visit your motherboard manufacturer's support page (ASUS, Gigabyte, MSI, etc.). The chipset drivers are the backbone, ensuring all the core components on the board communicate effectively.
- Other Hardware: For everything else, the manufacturer's website is always your safest and most reliable source.
Pro Tip: I strongly recommend avoiding third-party driver update tools. They promise convenience but often install incorrect or outdated drivers, creating more headaches than they solve. Stick to the official sources; it's the professional way to do it.
Restoring Your Digital Life
Now for the best part—making the PC feel like yours again. Start by installing your essential applications, like your preferred web browser, office suite, and any other programs you use daily. With your core software in place, you can move on to bringing your personal data back home from the backup you made earlier.
Carefully copy your documents, pictures, music, and other files from your external drive or cloud service back into their familiar folders. It pays to be methodical here to make sure everything ends up where it belongs. Once that's done, you've successfully learned how to reinstall windows operating system.
In a diverse tech environment like Southern Ontario, this process can look very different from one place to the next. For large organizations, stability and hardware support are paramount. Many businesses opt to reinstall or stick with Windows 10, even with newer versions available, simply because its proven compatibility with their existing infrastructure is a massive advantage. If you're interested, you can learn more about global OS market share trends and insights on procurri.com.
With your files and software restored, all that's left is the fine-tuning. Personalize your desktop, tweak your privacy settings, and configure your favourite apps. To truly get the most out of this fresh start, take a look at our complete guide to optimizing your system for peak performance.
Common Questions About Reinstalling Windows
Even with a step-by-step guide in hand, you're bound to have a few questions when you're staring down a full operating system reinstall. It’s a big job! Let's go over some of the most common things people ask us about when we're helping clients around Hamilton.
How Long Does a Windows Reinstallation Take?
This is the big one, and the honest answer is: it depends. If you're running a newer computer with a speedy SSD, the part where Windows actually copies its files over might be surprisingly quick—maybe just 15 to 20 minutes.
But that's only one piece of the puzzle. You have to factor in the time to back up your important files, create the USB installer, and then the really time-consuming part: reinstalling all your programs, drivers, and updates afterwards. Realistically, you should block out an entire afternoon for the whole project. Trust me, trying to rush this is a recipe for frustration.
Will Reinstalling Windows Remove Viruses?
Absolutely. A clean install is the definitive way to get rid of nasty, persistent malware. The process completely formats your main drive, which means everything on it gets erased—including any viruses, spyware, or other junk that might have dug itself deep into your system.
This is exactly why learning how to reinstall windows operating system is such a powerful skill. It's your ultimate "scorched earth" solution for a computer that's been compromised, giving you a truly fresh, secure start.
Do I Need My Product Key to Reinstall Windows?
You'll be happy to hear that you probably don't. For most computers that originally came with Windows 10 or 11, the licence is digital and tied directly to your computer's motherboard.
When the installer asks for a product key, you can usually just click "I don't have a product key" and continue. As soon as the installation is done and you connect to the internet, Windows will check in with Microsoft's servers, recognise your machine, and activate itself automatically. It's a far cry from the old days of hunting for sticker keys.
Article created using Outrank
No Responses