When your screen starts flickering or the console just won't turn on, it's easy to assume the worst. But a full-on gaming console repair might not be necessary. More often than not, what looks like a catastrophic hardware failure is actually just a minor software bug or a cable that's come loose. Before you panic, let's walk through a few simple diagnostic steps to figure out what's really going on.
Is Your Gaming Console Actually Broken?
We've all been there—that gut-wrenching moment when your PlayStation, Xbox, or Switch starts acting up. Before you jump online to find "gaming console repair in Hamilton," take a breath. Many of the most common console problems have surprisingly simple solutions you can handle yourself, no professional help needed.
This isn't just about saving a few bucks. It's about getting a clear picture of the problem. If you do end up needing a pro, being able to explain the issue accurately makes all the difference between a quick fix and a major, expensive repair.
Start with the Simplest Checks First
In any troubleshooting situation, you always want to start by ruling out the most obvious culprits. It’s almost comical how often a "dead" console is just the result of a simple oversight. These first checks are the bedrock of a good diagnosis.
- Check All Physical Connections: Make sure the power cord is pushed all the way into both the console and the wall outlet. Do the same for your HDMI cable—check the connection at the back of the console and the TV. A slightly wiggly cable is the number one cause of a blank or glitchy screen.
- Inspect Your Cables: Give your cords a quick once-over. Are there any visible frays, sharp kinks, or bent pins on the connectors? A damaged cable can cause all sorts of problems, from an intermittent signal to the console not turning on at all. If you have spares, try swapping out both the HDMI and power cords.
- Perform a Full Power Cycle: Don't just put your console into rest mode and hope for the best. Shut it down completely. Then, unplug it from the wall, wait at least 60 seconds, and plug it back in. This "hard reset" is fantastic for clearing out temporary software glitches that cause performance issues.
I once had a client in Hamilton who was absolutely convinced their PS4 motherboard was fried because of the infamous 'blinking blue light.' Before I even opened it up, I asked them to bring in their cables. Sure enough, the HDMI cord was slightly damaged and wasn't seating properly. A new $15 cable solved a problem they thought would cost them hundreds.
Decoding Your Console's Error Messages
Those error codes and flashing lights aren't just there to annoy you—they're the console's way of telling you what's wrong. Think of them as diagnostic tools. Instead of just sighing and restarting, take a moment to understand what your machine is trying to communicate.
A quick search for the exact error code (like "Xbox error E102") will usually point you to official support pages with clear, step-by-step solutions. This is the fastest way to figure out if you're dealing with a software problem, like a corrupted update, or a real hardware failure, like a dying hard drive. It's a similar process for gaming PCs, a topic we explore more in our guide on DIY fixes for gaming computers in Hamilton.
Differentiating Hardware and Software Failures
After you've covered the basics, you can start narrowing down whether the issue is with the physical components (hardware) or the operating system (software).
A software issue often looks like this:
- The console crashes, but only when you try to load a specific game.
- The main menu or user interface feels incredibly slow or freezes up.
- You're having trouble connecting to online services, but your internet is fine.
On the other hand, a hardware failure usually presents with more dramatic symptoms:
- The console is completely dead and won't power on.
- You hear strange clicking, grinding, or whirring noises from inside the machine.
- There are weird graphical glitches—like strange colours or patterns—on the screen no matter what game or menu you're in.
By paying close attention to these symptoms and running through the initial checks, you can get a much clearer idea of what's broken. This groundwork is the most crucial part of any gaming console repair, helping you decide whether it's something you can fix yourself or if it's time to call in an expert here in Hamilton.
Your Essential Console Repair Toolkit
Ever tried to fix something with the wrong tool? We’ve all been there. Attempting a console repair without the right gear is a surefire way to turn a minor hiccup into a major headache. Trust me, stripping a proprietary screw because you used a standard screwdriver is a frustrating, and often terminal, mistake.
This isn't just a shopping list; think of it as your first line of defence against the most common DIY repair blunders. Having these specific tools ready to go is the most important step in any successful gaming console repair.
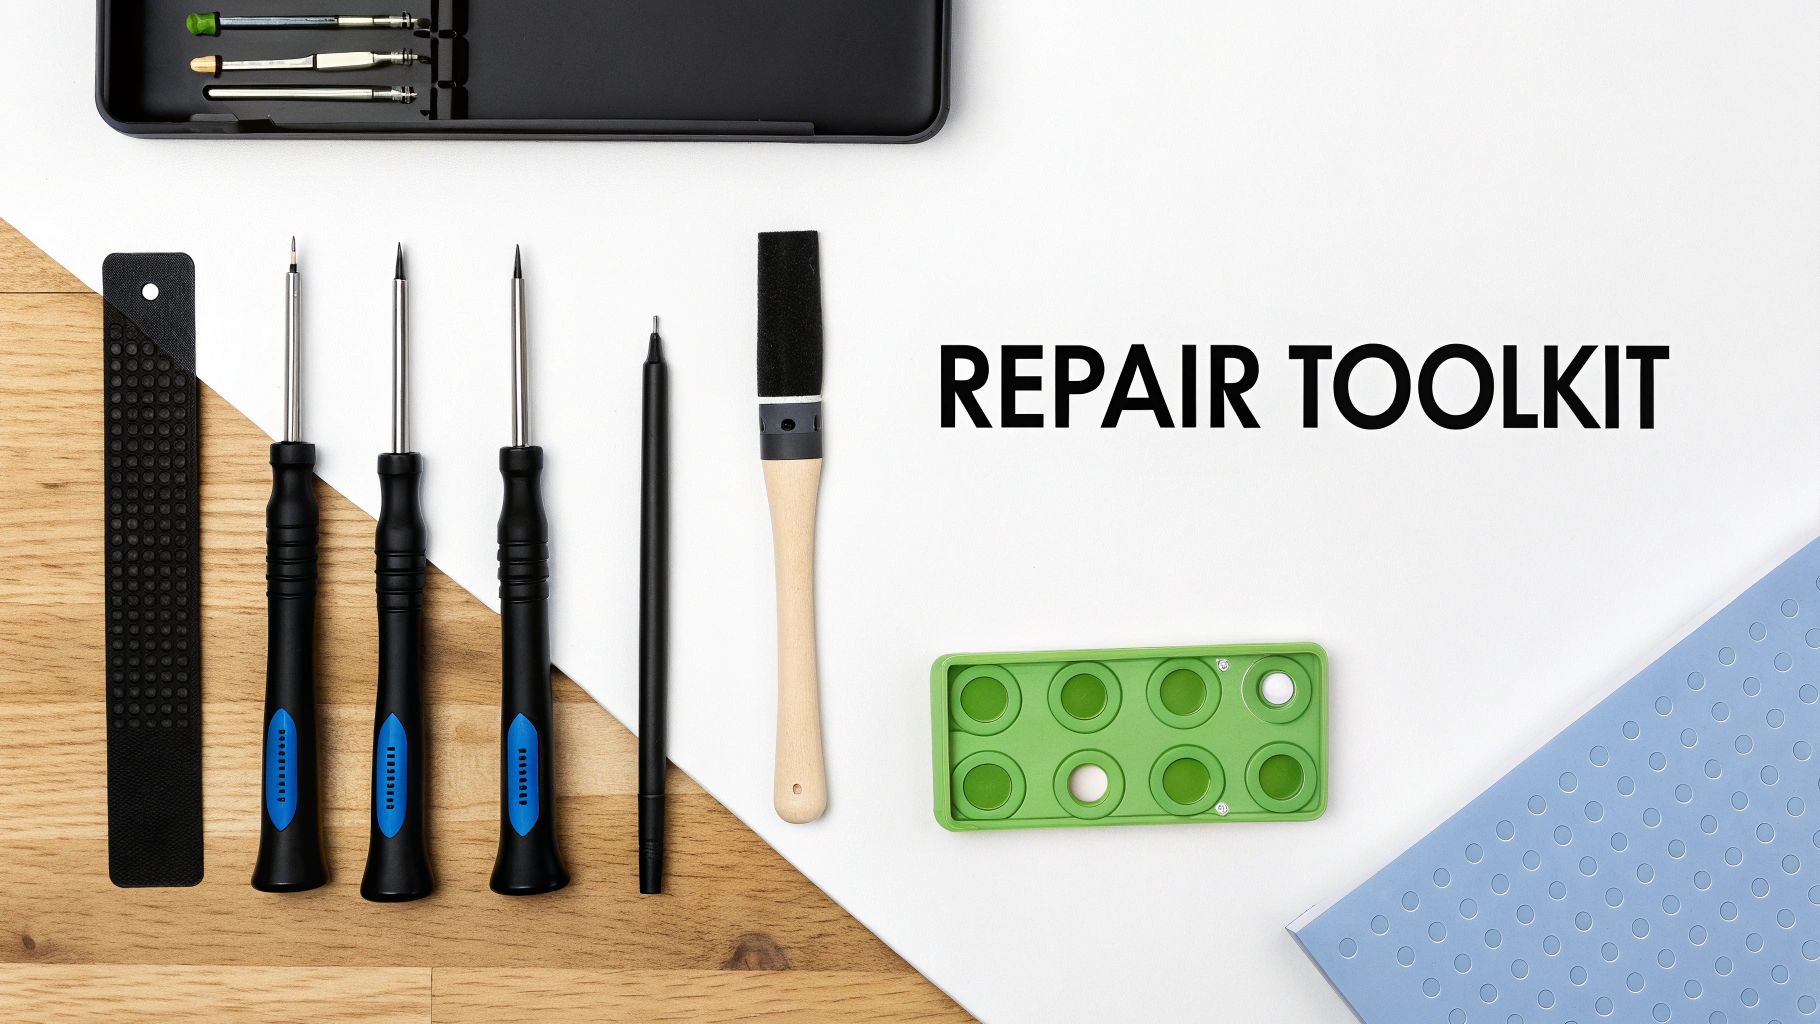
Must-Have Screwdrivers And Security Bits
That old Phillips screwdriver from your junk drawer simply won't work for modern consoles. Manufacturers use very specific, and often proprietary, screws precisely to keep people out. Using the wrong bit will chew up the screw head, turning a five-minute fix into an afternoon of frustration.
- T8 & T9 Torx Security Screwdrivers: These are absolutely non-negotiable for most Xbox and PlayStation models. The key here is the "security" part—a small pin in the centre of the screw head that stops a standard Torx bit from fitting.
- Tri-Point Y00 Screwdriver: This one is a must for almost all Nintendo hardware, especially the Switch and its Joy-Cons. Its three-pronged head is notoriously easy to strip if you try to force anything else.
- JIS #00 & #0 Screwdrivers: At a glance, they look just like Phillips screws, but many Japanese electronics, including PlayStation consoles, use the Japanese Industrial Standard (JIS). Forcing a Phillips driver into a JIS screw can cam out and damage it, so having the right set is crucial.
Getting the right tools is half the battle when working on these complex machines. To give you a clearer picture, here’s a breakdown of what you'll typically need for each of the big three consoles.
Essential Toolkit for Common Console Repairs
| Tool | Purpose | PlayStation | Xbox | Nintendo Switch |
|---|---|---|---|---|
| T8/T9 Torx Security | Opening the main chassis and internal components. | ✔ | ✔ | – |
| Tri-Point Y00 | For Joy-Cons, backplate, and internal screws. | – | – | ✔ |
| JIS Screwdriver Set | For various internal screws that look like Phillips. | ✔ | – | ✔ |
| Plastic Spudgers | Safely prying open plastic casings without scuffs. | ✔ | ✔ | ✔ |
| Anti-Static Wrist Strap | Prevents static discharge from damaging the motherboard. | ✔ | ✔ | ✔ |
| Fine-Tipped Tweezers | For handling tiny ribbon cables and connectors. | ✔ | ✔ | ✔ |
| Isopropyl Alcohol (99%) | Cleaning thermal paste and electronic components. | ✔ | ✔ | ✔ |
Having these basics on hand will prepare you for the most common repairs, from deep cleaning a fan to replacing a hard drive.
Prying Tools And Safety Gear
Once you've got the screws out, the next challenge is separating plastic shells held together by an array of delicate internal clips. This is where patience—and the right prying tools—prevent you from hearing that awful crack of breaking plastic.
Your best friend in this entire process is an anti-static wrist strap. It sounds overly cautious, but a single, invisible shock of static electricity from your body is more than enough to permanently fry the motherboard. It’s a $10 investment that can save you from a $300+ mistake.
Grounding yourself properly is a fundamental safety measure, and it's a non-negotiable step in any professional electronics repair. For a closer look at how we handle sensitive components with care, check out our detailed step-by-step guide on the MacBook repair process.
Keeping Everything Organized
A modern console is a maze of dozens of tiny screws, often in slightly different lengths. Mix them up, or put a long screw where a short one should be, and you could punch right through the motherboard. It happens more often than you'd think.
A few pro tips I've learned over the years:
- Use a Magnetic Mat: These project mats have a grid, allowing you to lay out screws in the same pattern you removed them from. It creates a perfect map for reassembly.
- Take Photos As You Go: Before you unplug a single ribbon cable or remove a component, snap a quick picture with your phone. This visual diary is an absolute lifesaver when you're putting it all back together.
- Label Everything: Small containers, ice cube trays, or even just sticky notes work wonders. Label your parts and their matching screws. It might feel like overkill, but it completely removes the guesswork later on.
By putting this toolkit together, you’re not just getting ready for a repair; you’re setting yourself up for a smooth, stress-free process. From Hamilton to anywhere else, having the right gear on hand is what separates a successful fix from a very expensive paperweight.
Solving Common PlayStation Hardware Failures
Whether you’re still rocking a trusty PS4 or have the powerhouse PS5, you’ve probably realized they each have their own quirks. Sooner or later, hardware issues can pop up and bring your gaming to a sudden, frustrating halt. The good news? Many of these common problems are well-understood and totally fixable.
Sometimes, all it takes is a little bit of know-how to get things running smoothly again, saving you a trip to a local gaming console repair shop. We'll dive into two of the most frequent hardware headaches I see with PlayStation consoles: the classic slow-as-molasses PS4 and the PS5 that sounds like a jet engine.
Upgrading a Failing PS4 Hard Drive
Is your PS4 taking an eternity to load a game? Does the main menu stutter and lag, or has the system started crashing for no reason? Those are the textbook symptoms of a dying hard disk drive (HDD). After years of faithful service, the mechanical parts in these drives simply wear out, strangling the console's performance.
One of the best upgrades you can give an aging PS4 is replacing that old hard drive. Swapping it out for a fresh HDD or, even better, a zippy Solid State Drive (SSD), can breathe new life into the system. The difference in load times and responsiveness is staggering; it honestly feels like you’ve unboxed a brand-new console.
If you're ready to tackle this yourself, here’s what the process generally looks like:
- First, back up your data. This is non-negotiable. Save your game data to a USB stick or upload it to the PlayStation Plus cloud before you touch a single screw.
- Grab the system software. Head over to the official PlayStation website and download the latest PS4 system software onto a different USB drive. You'll need this to install the operating system on your new drive.
- Swap the physical drive. Getting to the hard drive is surprisingly easy on most PS4 models. It's usually tucked behind a small plastic panel, held in place by just a few screws. Slide the old one out, and slide the new one in.
- Reinstall the software. With the new drive in place, you'll start the PS4 in Safe Mode. From there, you just use the USB drive to guide the console through a fresh installation.
From my experience as a Hamilton-based technician, the biggest pitfall people run into is downloading the wrong file from Sony's website. They offer a small "update" file and a much larger "reinstallation" file. You must use the full reinstallation file, or the process will fail every single time. It's a fantastic first-time repair, as long as you get that one detail right.
Taming an Overheating PS5
The PS5 is an absolute beast, but all that power generates a serious amount of heat. If your console's fan has started revving up and sounds like it’s about to achieve liftoff, you've got a classic case of dust buildup. Over time, dust and debris get pulled into the console and clog the fan and internal heatsink, trapping hot air inside.
This isn't just about noise. An overheating console will eventually throttle its own performance, leading to frame drops, weird graphical glitches, or even shutting down completely to protect itself from damage. A thorough internal cleaning is usually all it takes.
To do it right, you'll need to pop off the PS5's side plates to get direct access to the fan. A can of compressed air is your best friend here—use it to blow the dust out from the fan blades and deep within the heatsink fins. For an even deeper clean, you can carefully remove the fan itself to clear out any stubborn blockages.
Spotting a Faulty HDMI Port
A trickier problem to diagnose is a failing HDMI port. The early signs can be subtle. You might see the screen flicker for a split second or notice sparkly little dots, known as "artifacts," peppering the display. Before long, you'll just get a "No Signal" message. This kind of damage is often caused by repeatedly plugging and unplugging the cable or an accidental yank.
Take a close look at the port itself. Can you see any pins that look bent, broken, or pushed back? Does the HDMI cable feel wobbly or loose when it’s plugged in? Those are dead giveaways of physical damage.
Unlike swapping a hard drive, replacing an HDMI port is not a beginner-friendly job. It’s an advanced repair that requires specialized micro-soldering equipment and a very steady hand. The port is attached to the motherboard by dozens of tiny pins, and one wrong move can kill the whole board. If you suspect your HDMI port is the problem, this is one repair that's definitely best left to a professional gaming console repair specialist in Hamilton.
How to Fix Common Xbox Issues
From the infamous “Green Screen of Death” to a disc drive that suddenly ghosts you, Xbox consoles have their own special ways of causing headaches. Whether you're in Hamilton or anywhere else, seeing your Xbox One or Series X/S malfunction is incredibly frustrating. The good news is that many of these problems are well-known, documented, and often fixable with a bit of patience.
Before you start looking for a professional gaming console repair service, let's walk through some of the most frequent Xbox issues. We’ll cover how to diagnose a stubborn disc drive and tackle power supply failures—two of the most common hardware faults that can bring your gaming sessions to a screeching halt.
Dealing With a Faulty Disc Drive
For gamers who still love physical media, a non-responsive disc drive is a massive problem. You insert a game, and… nothing. Maybe you hear a strange clicking or grinding noise, or the console simply refuses to acknowledge the disc at all. This usually points to one of three culprits.
- A Dirty Laser Lens: Dust is the mortal enemy of every optical drive. Over time, a fine layer of dust can coat the laser lens, preventing it from reading the data on your discs.
- Mechanical Failure: The drive itself contains tiny moving parts—rollers, gears, and an eject mechanism. If any of these components get knocked out of alignment or break, the drive will stop working properly.
- Firmware Glitches: Sometimes, the problem isn't physical at all. A software bug can cause the console to fail to communicate with the disc drive properly.
Before you even think about a replacement, a simple power cycle is your first move. Turn the Xbox off completely, unplug it for a minute, and then restart. This simple action can often clear up minor software conflicts. If that doesn't do the trick, you might be looking at a deeper hardware issue that needs a professional touch from a local Hamilton expert.
Diagnosing Power Supply Problems
An Xbox that won't turn on feels like a catastrophic failure, but the cause is often just a faulty power supply unit (PSU). The troubleshooting process for this is quite different between the older Xbox One and the newer Series X/S models.
For the Xbox One (Original Model)
The original Xbox One features a large, external power brick with an indicator light. This light is your best diagnostic tool, believe it or not.
- Solid White or Orange Light: This is good news. It means the power brick is receiving power and functioning correctly. If the console still won't turn on, the problem is likely inside the Xbox itself.
- No Light at All: This means the power brick isn't getting any juice. First, check that the wall outlet is working. Then, make sure all cables are plugged in securely.
- Flashing Orange Light: This signals a problem with the power brick itself. It's likely overheating or has an internal fault.
A dead power brick is a common point of failure. Before declaring the console dead, try borrowing a friend's power brick to see if that resolves the issue. It's a quick test that can save you a lot of guesswork and a potentially unnecessary repair fee.
For Xbox One S/X and Series X/S
Microsoft moved the power supply inside the console starting with the Xbox One S. This makes troubleshooting a bit trickier, as there's no external indicator light to check.
If your newer console isn't powering on, start with the basics. Try a different power cord and plug it into a wall outlet you know is working. If it's still completely unresponsive, the internal PSU has likely failed. Replacing an internal power supply is a more involved gaming console repair that requires opening up the console, making it a task best left to those comfortable with electronics or a professional technician in Hamilton.
The Green Screen of Death
The Xbox "Green Screen of Death" is a particularly nasty issue where the console gets stuck on the green boot-up screen and never loads the dashboard. This typically happens after a system update has been interrupted or corrupted. It can also be a sign of a failing hard drive, as the console is unable to load the necessary operating system files.
If you encounter this, your first step should be to try an offline system update. This process involves downloading the latest update files onto a USB drive from a computer and using the console's troubleshoot menu to install them manually. It's a crucial step that can often resolve software corruption without needing a full hardware replacement.
However, if the offline update fails repeatedly, it strongly suggests the internal hard drive is the root cause. This problem often requires a local Hamilton repair shop to swap out the drive and reinstall the system software.
Many of these issues are tied to the console’s software and its connection to the internet. Ensuring your home network is stable can prevent update-related problems. For tips on creating a more reliable connection, you can learn more about how to get the most out of your home network in our guide to network setup and optimization.
Tackling Common Nintendo Switch Repair Headaches
The Nintendo Switch is a brilliant piece of kit, but its a genius design—flipping from a home console to a portable powerhouse—is also its Achilles' heel. All that movement, docking, and undocking puts a unique kind of strain on its parts, leading to some very specific, and very common, problems. If you're looking up "gaming console repair in Hamilton," chances are you've run into one of these yourself.
From the notorious Joy-Con drift to a screen shattered after a bad fall, these are the bread-and-butter jobs for any local repair tech. Let's walk through how to diagnose and handle the most frequent hardware failures you'll see with the Switch.
The Never-Ending Battle Against Joy-Con Drift
Ah, Joy-Con drift. If you own a Switch, you almost certainly know what this is. It's that maddening moment when your character starts wandering off on their own, even when you aren't touching the analog stick. It's been a thorn in the side of Switch owners since day one.
Before you fork out for a new set of controllers, there are a couple of things you can try at home. First, head into the system settings and recalibrate the joysticks. Sometimes, that's all it takes. If the phantom movements persist, grab a can of compressed air and give a few quick blasts under the little rubber skirt at the base of the joystick. This can dislodge dust that's interfering with the sensors.
When those tricks don't cut it, the joystick mechanism itself is probably worn out. This is a very common gaming console repair and, believe it or not, a pretty good first project if you're looking to get into DIY fixes. Replacing the joystick module requires a bit of patience, especially when dealing with the tiny ribbon cables and battery inside, but it's a well-documented and very doable repair.
Charging and Docking Dilemmas
Another all-too-common issue is a Switch that flat-out refuses to charge or connect to its dock. Nine times out of ten, the problem lies with the console's single USB-C port. It takes a lot of abuse from being plugged in and pulled out every single day.
Always start with the simple stuff. Is the official Nintendo AC adapter working? Can you test the dock with a friend's Switch to rule it out? If those check out, get a flashlight and take a close look at the USB-C port on the console itself. You're looking for any bent pins, packed-in lint, or a port that feels wobbly to the touch.
A physically damaged port usually needs to be replaced, and this is where things get tricky. It's an advanced repair that involves micro-soldering directly onto the motherboard. Messing this up can damage other critical components, so it's often a job best left to the pros in Hamilton.
This flowchart gives you a good idea of the diagnostic process, moving from a basic assessment to troubleshooting and, finally, the actual repair.
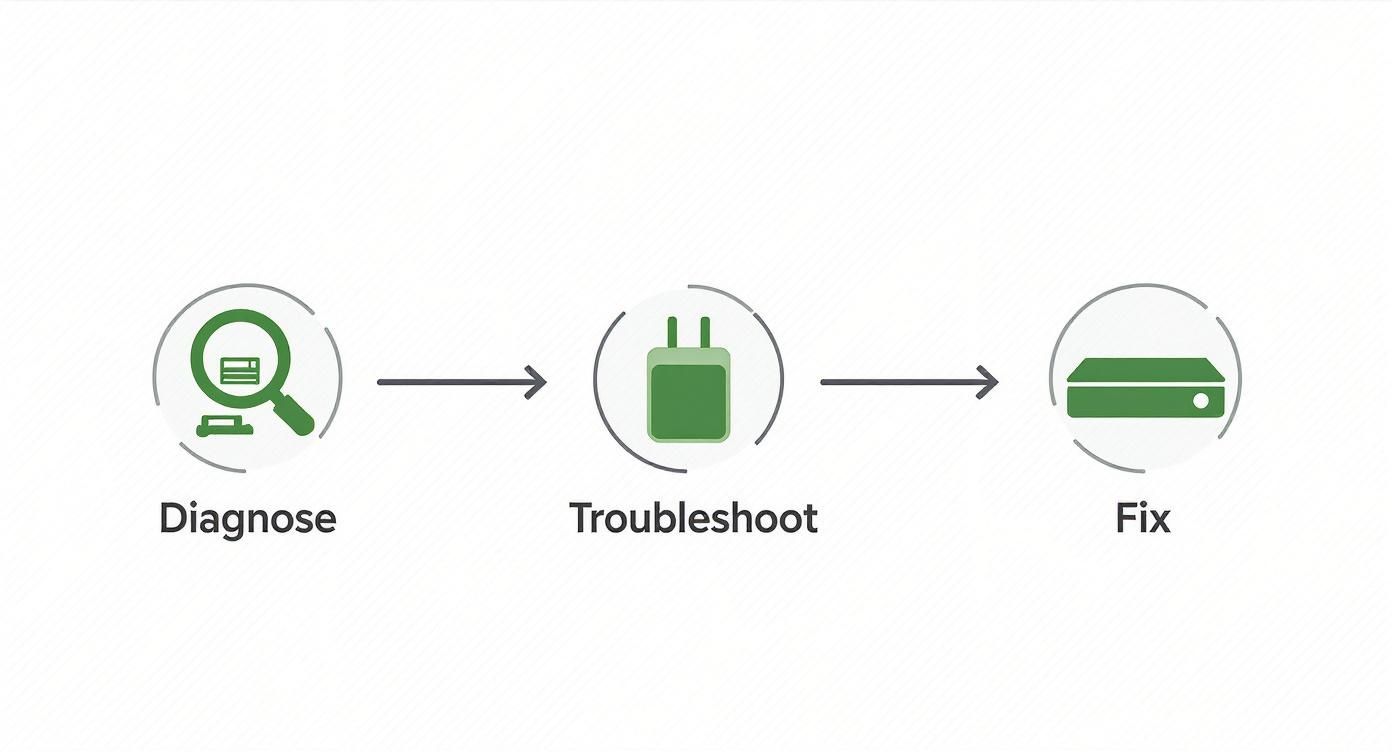
As the graphic shows, a methodical approach is the best way to figure out what’s really wrong with your console and get it fixed right.
Handling a Cracked Screen Replacement
The portable nature of the Switch means cracked screens are a heartbreakingly frequent occurrence. The good news is that a screen replacement is entirely possible. The bad news? It demands a steady hand and a lot of care. The screen assembly is actually two parts: the digitizer on top (which handles touch) and the LCD panel underneath it.
The hardest part of the job is dealing with the strong adhesive holding the screen in place and the tiny, fragile ribbon cables that connect everything. You'll need a heat gun or a hairdryer to gently soften the glue, then carefully pry the screen assembly away from the frame without damaging anything.
Here’s a pro tip I can't stress enough: keep your workspace perfectly clean. Even a single speck of dust that gets trapped between the new LCD and the digitizer will be a permanent, annoying black dot on your screen forever.
Finding quality replacement parts can also be a challenge. It's interesting to note that recent Right to Repair legislation passed in California, which is meant to make parts more available, actually has a specific exemption for game consoles. This means manufacturers aren't obligated to sell official parts or provide repair guides, making a proper gaming console repair more difficult. You can read more about the bill and its impact on the gaming world.
Your Top Questions About Gaming Console Repair in Hamilton
When your go-to gaming console suddenly dies, it's easy to feel a bit lost. A dozen questions probably pop into your head at once. To cut through the noise and help you figure out your next move, we've pulled together the most common questions we hear from gamers here in Hamilton.
What Should I Expect to Pay for a Console Repair?
The cost of a repair really boils down to two things: which console you have and what's actually wrong with it. There’s a world of difference between a minor tweak and a major overhaul.
For instance, a simple fix like swapping out a drifting joystick on a Nintendo Switch Joy-Con is a pretty quick job. Most local shops in Hamilton will charge somewhere in the $40 to $60 range for that. Easy peasy.
But then you have the more serious stuff. A broken HDMI port on a PS5 or an Xbox Series X isn't a simple swap; it requires delicate micro-soldering work right on the motherboard. That kind of specialized, labour-intensive repair can run anywhere from $150 to $250. A reputable shop should always offer a free diagnosis and give you a firm quote before they ever pick up a tool.
Is It Actually Worth Fixing an Older Console?
Ah, the classic question. And honestly? It depends.
If you’re holding onto a last-gen console like a PS4 or an Xbox One, you have to do a little math. Check the repair quote against the price of a working, pre-owned console. If the fix is going to cost you more than half the price of a replacement, it might just be time to let it go and upgrade.
For newer machines like the PS5 and Xbox Series X, though, repairing is almost always the smarter financial move. The same logic applies to vintage or special edition consoles that hold sentimental value. Plus, fixing your gear is a great way to keep e-waste out of our landfills, which is a win for everyone.
When Should I Skip the DIY and Call a Pro?
Knowing when to tap out and call for backup is crucial. You should absolutely leave it to a professional gaming console repair service if you run into these situations:
- Soldering is required. Any repair that involves a soldering iron—like replacing a charging port, HDMI port, or other motherboard components—is a job for an expert with the right gear.
- You're dealing with delicate parts. Consoles are a maze of tiny, paper-thin ribbon cables and fragile connectors. If you’re not comfortable handling them, you could easily turn a small problem into a big one.
- The console is still under warranty. This one's a no-brainer. Don't even think about opening it up yourself. Contact the manufacturer first to avoid voiding your coverage.
On the other hand, if you're just doing a deep clean, replacing an external power brick, or swapping out the hard drive on a PS4, going the DIY route can be a fun, money-saving project.
A failing hard drive is a good wake-up call about your data. All those saved games are at risk. It’s a perfect example of why a solid backup plan is essential for all your tech. To learn more, take a look at our article comparing local vs. cloud backup solutions.
How Can I Find a Good Local Console Repair Shop in Hamilton?
Finding a technician you can trust is the most important step. A quick search for "gaming console repair near me" or "console repair Hamilton" is a great starting point, but don't stop there. Really dig into the Google reviews and see what people are saying. Look for shops that specifically call out their experience with your exact console model.
The best shops show their confidence in their work. Do they offer a free diagnostic? Is there a warranty on their repairs? These are signs of a business that stands by what they do. You're paying for expertise, after all. For context, in a competitive market like California, the average wage for a technician is about $17.83 per hour. As you can discover more insights about technician wages on ZipRecruiter.com, this reflects a field where skill and experience matter.
If you're in the Hamilton area and need a straight-up, reliable fix for your PlayStation, Xbox, or Switch, Klimka Computer Solutions has you covered. Our technicians will give you a fast, honest diagnosis and get you back to your game in no time.
Get your free gaming console repair estimate today at klimkacomputersolutions.com
2 Responses
[…] getting a professional opinion is your next best move. For those in the Hamilton area, our expert gaming console repair services can diagnose the issue quickly and get you back in the […]
[…] Let us handle the tricky stuff. You get back to gaming. If you’re ready for a reliable fix, check out our expert gaming console repair services. […]