
Before you even think about running memory tests, you need to know what you’re looking for. Your computer usually gives you hints that something’s wrong, and these little quirks are often the first sign that your RAM is on its way out. Learning to spot these symptoms is the crucial first step before you start any diagnostic process.
Recognizing the Signs of Failing RAM
Think of your computer’s RAM (Random Access Memory) as its short-term working space. When that space becomes unreliable, your whole system starts acting up. The tricky part is that the symptoms can be all over the place, often looking like software glitches, driver issues, or even problems with your storage drive.
For example, a gaming rig you’ve carefully built might suddenly hit you with a Blue Screen of Death (BSOD) right in the middle of a match. Or maybe your work-from-home laptop decides to freeze up during an important video call, with no error message to explain why. These frustrating, seemingly random events are classic signs of faulty RAM, and a common issue we see from clients in the Hamilton area.
To help you get a clearer picture, I've put together a quick reference table. It breaks down what these symptoms actually look like in the real world.
Common Symptoms of Bad RAM
| Symptom | What It Looks Like | Common Scenario |
|---|---|---|
| Random System Crashes | Your computer abruptly reboots or shows a BSOD. | You're browsing the web or playing a game, and everything just shuts down without warning. |
| Frequent Freezing | Applications become unresponsive and require a force-quit. | A program that's usually stable, like your browser or word processor, locks up repeatedly. |
| Corrupted Files | Files you recently saved are now unreadable or full of errors. | You open a document you worked on yesterday, and it's either gibberish or won't open at all. |
| Poor Overall Performance | Your machine feels sluggish and struggles with simple tasks. | Just opening folders or switching between apps takes noticeably longer than it used to. |
If your main complaint is a slow-running machine, the problem might not be limited to RAM. Our guide on how to fix a slow laptop offers a more comprehensive look at performance issues.
The biggest tell-tale sign of bad RAM is inconsistency. When an error is difficult to reproduce and seems to happen at random, your memory modules should be the first thing you suspect.
Why Proactive Testing Matters
Testing isn't just for when things go wrong; it's also a critical part of prevention. Any time you build a new PC or upgrade your memory, you should run a thorough test. It's the only way to be certain the new modules are functioning correctly and are truly compatible with your motherboard.
A quick stress test right after installation can save you a world of headaches down the road. It helps you catch a faulty stick right out of the box, ensuring you can get it replaced under warranty without any fuss. By paying attention to the warning signs and testing proactively, you keep your computer a reliable tool instead of a constant source of frustration.
Getting Started with Built-In Tools on Windows and macOS

Before you even think about downloading third-party software, it’s always best to check what’s already under the hood. Both Windows and macOS come equipped with their own diagnostic utilities, and they’re surprisingly capable. Think of them as your first line of defence when you suspect a memory issue.
These built-in options are convenient, easy to run, and often all you need to get a clear yes or no on whether your RAM is acting up. It's the most logical place for anyone to start.
Running Windows Memory Diagnostic
For those on a Windows machine, your go-to is the Windows Memory Diagnostic tool. It’s a no-frills utility that gets the job done by scanning your RAM for errors before the full operating system even boots up, which allows for a much deeper and more accurate check.
Getting it started is simple. Just pop open your Start Menu, type in "Windows Memory Diagnostic," and click the application when it appears. You’ll get a prompt asking if you want to restart right away or schedule the test for your next reboot.
If you’re eager for answers, choose to restart immediately. Your computer will reboot into a basic blue-screen environment and kick off a Standard test. For most situations, this is perfectly adequate for catching common RAM problems.
However, if you're chasing an intermittent or particularly stubborn issue, you'll want to run a more aggressive scan. Once the test starts, press the F1 key to open the advanced options. From there, you can switch to the Extended test. Be warned, though—it performs a much more exhaustive set of checks and will take a whole lot longer to finish.
Once the diagnostic is complete, your PC will restart as usual. The results won't just pop up on your screen; you'll need to do a little digging in the Event Viewer. Find it by searching in the Start Menu, then navigate to Windows Logs > System. Look for an event with the source name "MemoryDiagnostics-Results." If it says no errors were found, you can breathe a sigh of relief. If it reports problems, you've confirmed your RAM is the culprit.
Using Apple Diagnostics on Your Mac
Over in the Mac world, you have a similarly powerful tool called Apple Diagnostics (you might see it called Apple Hardware Test on much older models). How you launch it depends on whether you have a newer Apple Silicon Mac or an older one with an Intel chip.
Here’s the breakdown:
- For Apple Silicon Macs: Shut your Mac down completely. Now, press and hold the power button until the startup options window appears. From there, press and hold Command (⌘)-D to launch into Diagnostics.
- For Intel Macs: First, shut down your Mac. Turn it back on, but as soon as you do, immediately press and hold the D key. Keep it held down until you see a progress bar or a screen asking you to choose a language.
Once you’re in, the diagnostic will run on its own, testing all of your system's hardware, including the memory. It’s a comprehensive, all-in-one scan.
When the test finishes, the results will show up right on the screen. If it finds a memory problem, it will give you a specific reference code, like PPM001. Jot this code down! It points directly to a RAM issue and is incredibly useful when you're looking up solutions or seeking repairs.
If the results are inconclusive but you’re still having problems, it might be time for a professional opinion. Learning more about expert computer repair services can help you figure out the best next steps.
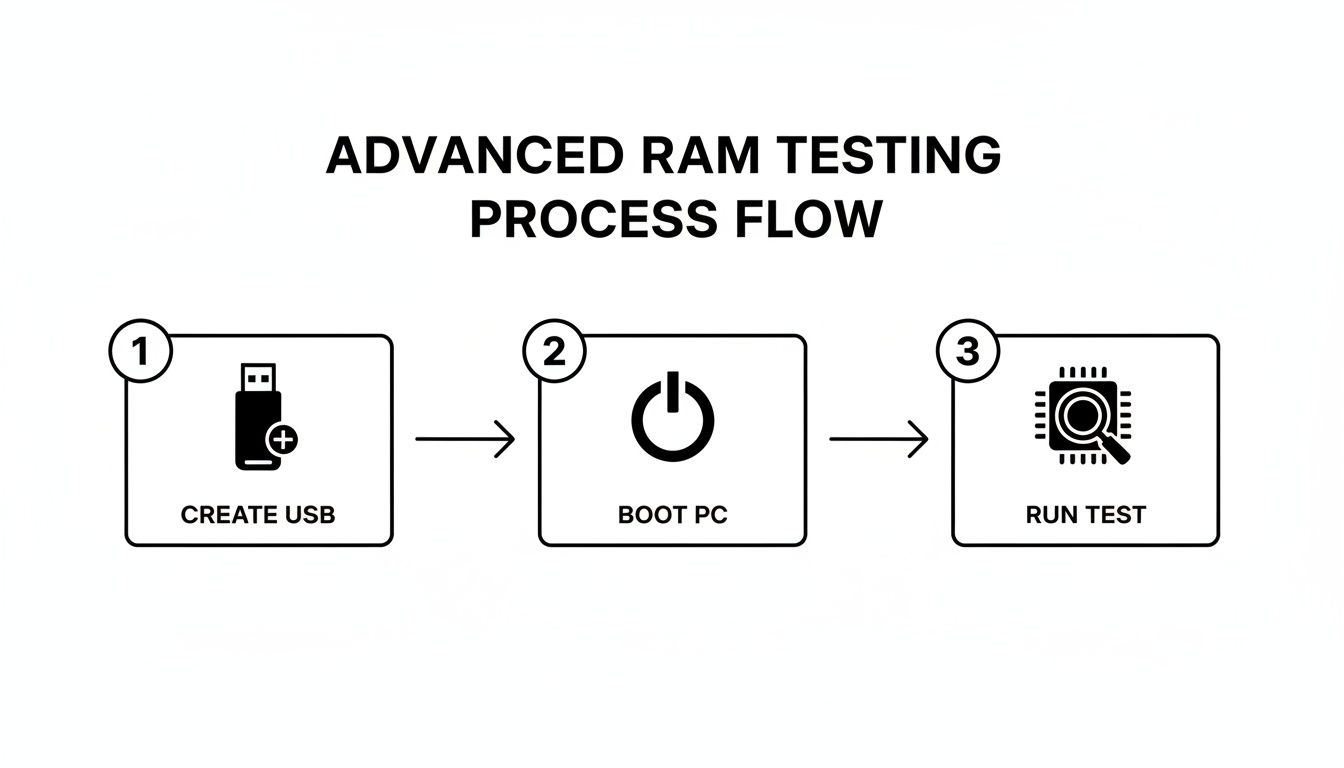
Running an Advanced Scan with MemTest86
So, the built-in diagnostics came up clean, but your computer is still giving you grief with random crashes and frustrating blue screens. When you suspect RAM is the culprit but the basic tools can't prove it, it's time to pull out the big guns. For a truly bulletproof diagnosis, professionals and system builders—from our local clients in Hamilton all the way to global tech hubs—turn to a tool called MemTest86. It's the gold standard, and for very good reason.
Unlike the software that runs inside your operating system, MemTest86 is completely independent. You boot it from a USB drive, which lets it test your RAM in a clean environment, free from any interference from Windows or macOS. This direct hardware access is what allows it to meticulously check every single memory cell for faults, giving you the most thorough analysis possible.
Preparing and Launching the Test
First things first, you'll need to create a bootable USB drive. Grab a spare USB stick (be warned, anything on it will be wiped) and use another computer to download the free version of MemTest86 from their official site. The download comes with a handy imaging tool that makes the whole process pretty straightforward.
With your bootable USB in hand, you need to tell your computer to start from it instead of its usual hard drive. This part can feel a bit technical, but it's just a few simple steps:
- Plug in the USB Drive: Pop the MemTest86 drive into an open USB port on the computer you need to test.
- Get into the BIOS/UEFI: Restart the machine and immediately start tapping the key to enter its setup menu. This is usually F2, F10, F12, or Delete—the right key often flashes on the screen for a second right as it powers on.
- Adjust the Boot Order: Once you're in the setup menu, look for a 'Boot' or 'Startup' tab. You'll want to change the boot priority to make the USB drive the very first device in the list.
- Save and Exit: Find the option to save your changes and exit. The computer will restart one more time, but now it will load directly into the MemTest86 interface.
The test usually kicks off on its own, and you'll see a screen filled with technical data as it begins cycling through its checks.
This is what the MemTest86 interface looks like when it begins a scan.
You can see the progress bar at the top, along with details about your CPU and RAM, while the main area shows the ongoing test patterns and any errors found.
Interpreting the Scan and Understanding Its Depth
MemTest86 doesn't just do a quick once-over; it hammers your RAM with a series of complex test patterns designed to expose any weakness. These algorithms are worlds away from what basic OS tools use. Think about it: the tech sector, including many of our professional clients here in Ontario, relies on intense memory testing algorithms like March C- to guarantee system integrity in everything from massive data centres to advanced manufacturing. In fact, deep memory diagnostics have become a standard practice in ensuring hardware reliability across the province's key industries. If you're curious, you can find out more about how these advanced RAM testing algorithms work in high-integrity systems.
A crucial best practice is to let MemTest86 run for multiple passes, ideally overnight. Intermittent errors—the kind that cause random, unpredictable crashes—often only show up after the RAM modules have heated up from extended use. A single pass might miss them entirely.
If the scan finishes with a clean bill of health (zero errors), it's highly likely your RAM isn't the problem. But if even one single error pops up in red, that's your smoking gun. Your RAM is faulty and needs to be replaced. There's really no such thing as a "minor" memory error.
Once you've confirmed faulty hardware, the best path forward is often a clean slate. After you've replaced the bad memory, take a look at our guide on how to reinstall the Windows operating system to ensure your system is stable and fresh.
How to Physically Isolate a Faulty RAM Module
So, your memory test came back with errors. What now? Before you rush out and buy new RAM, there’s one more crucial step. An error doesn't automatically mean you have a bad memory stick—the problem could be as simple as a poor connection or even a faulty slot on your motherboard.
This is where a little hands-on diagnostics comes in. By physically testing each stick of RAM, one by one, you can figure out for sure if the problem is the memory module itself or the motherboard slot it connects to. It’s a classic troubleshooting technique that can save you a lot of time and money.
Essential Safety First
Before you even touch a screwdriver, let’s talk safety. You're about to handle some of the most sensitive components in your computer, and a tiny zap of static electricity is all it takes to cause permanent damage.
- Disconnect All Power: The first thing to do is unplug the computer from the wall. No exceptions. Then, press and hold the power button for about 10 seconds to drain any leftover charge from the system.
- Ground Yourself: Find an unpainted metal part of your computer’s case and touch it for a few seconds. This simple action gets rid of any static electricity you've built up, protecting your components from electrostatic discharge (ESD).
Think of these two steps as non-negotiable. They protect your hardware investment.
The Single-Stick Isolation Technique
The goal here is a simple process of elimination. If you have more than one stick of RAM, you’ll test each one individually to find the troublemaker. This is exactly what our technicians in Hamilton do when hunting down elusive hardware faults.
Start by looking at the small plastic clips on both ends of the RAM slots on your motherboard. Push them outward, and you’ll see the RAM module pop up. From there, you can just lift it straight out.
Now, grab just one stick of RAM and install it into the primary memory slot. Your motherboard manual will tell you which one that is, but it’s often labelled A1 or DIMM1. Turn your computer back on and run your memory test again. If it passes, great! Power down, ground yourself, and move that same stick to the next slot and repeat the test.
Testing a single, known-good stick of RAM in every slot is a two-for-one deal. You're not just testing the stick; you're also confirming that each memory slot on the motherboard works properly. If that stick passes in three slots but fails in the fourth, you've probably found a bad motherboard slot, not bad RAM.
If you're using a bootable tool like MemTest86, the general workflow is pretty straightforward for each stick you test.
You’ll need to follow this pattern for every single RAM module you have. If one stick consistently throws errors no matter what slot it’s in, that's your faulty module. On the other hand, if all your RAM sticks fail in one specific slot, the motherboard is the likely culprit.
This methodical process takes the guesswork out of the equation. If you’re an Apple user dealing with similar hardware issues, you might find it helpful to see how the pros handle it; our MacBook repair process step-by-step guide offers a good look into expert-level diagnostics.
7. Understanding Your Test Results and What to Do Next
After hours of watching progress bars, you finally have your results. This is the moment of truth, where all that diagnostic work pays off with a clear action plan. Interpreting these results correctly is just as important as running the test in the first place, as it will tell you whether it's time to buy new hardware or keep digging for a different culprit.
Let's get one thing straight right away: there's no such thing as an "acceptable" memory error.
If your diagnostic tool—whether it was the built-in Windows tool or a powerhouse like MemTest86—reports even a single error, that stick of RAM is faulty. Full stop. A single bad memory cell might seem insignificant, but it’s a ticking time bomb that can lead to corrupted files, system-wide instability, and those infuriating, random crashes.
The need for perfect data integrity is a big deal, especially in high-stakes fields. For instance, many academic and research institutions in Southern Ontario rely on perfectly stable systems where a single data error could invalidate years of work. This really drives home why absolute memory integrity is non-negotiable for your personal computer, too.
Translating Test Outcomes Into Action
Your next move is dictated entirely by what the tests found. If you went through the single-stick isolation method we talked about earlier, you've left no room for guesswork and can pinpoint the problem with confidence.
Here’s how to make sense of the most common outcomes:
-
Clean Pass on All Tests: If every stick passed its test in every slot you tried, congratulations! Your RAM is almost certainly not the source of your system's problems. It’s time to shift your focus to other potential suspects, like an overheating CPU, a failing power supply, or wonky software drivers.
-
One Stick Fails in Every Slot: You've found the bad apple. This specific RAM module is defective and needs to be replaced. The good news is that your other modules and the motherboard slots are likely fine.
-
Multiple Sticks Fail in One Specific Slot: This is a different story. If good sticks start throwing errors only when they're in one particular slot, the problem isn't the RAM—it's the motherboard. This is a more serious issue that often requires replacing the entire motherboard.
A failed RAM test is one of the most common causes of the infamous Blue Screen of Death. Once you've swapped out the faulty memory, your system should become stable again. But if the problem continues, you might want to read our guide on how to fix the Blue Screen of Death in Windows 10.
So, what should you do with this information? The table below breaks down the results into a simple, actionable plan.
RAM Test Results and Your Next Steps
| Test Result | Interpretation | Recommended Action |
|---|---|---|
| No Errors Reported | Your RAM is healthy and not the cause of your issues. | Investigate other components: CPU temperature, power supply, storage drives, or software/driver conflicts. |
| Errors on a Single Stick | You have a faulty RAM module. | Replace the specific RAM stick. Check for warranty eligibility first. |
| Errors in a Single Slot | The memory slot on your motherboard is damaged. | This usually requires professional repair or a motherboard replacement. A temporary workaround could be to leave the slot empty. |
| Errors on All Sticks | Either all modules are faulty (unlikely) or there's a severe motherboard/CPU issue. | This points to a deeper hardware failure. Professional diagnostics are strongly recommended. |
This table should help you quickly decide on your next steps without any guesswork.
Taking the Final Steps
If you've identified a faulty RAM stick, your first move should be to check its warranty. Many memory manufacturers offer a limited lifetime warranty. You can typically start a Return Merchandise Authorization (RMA) process right on their website.
No warranty? No problem. You'll just need to purchase a replacement. Make sure the new module's specifications (e.g., DDR4/D5, speed, and capacity) match your existing RAM to ensure everything plays nicely together.
For more complex issues like a bad motherboard slot, or if you're in the Hamilton area and would rather have an expert handle it, give us a call. Klimka Computer Solutions is here to provide on-site diagnostics and get your machine back in top shape.
Frequently Asked Questions About RAM Testing
When you're trying to figure out how to test RAM memory, a few questions pop up time and time again. Getting the right answers can make all the difference, giving you the confidence to trust your results and decide what to do next.
How Long Should a RAM Test Run?
A single, complete pass with a tool like MemTest86 is a good starting point for a quick check. Think of it as the bare minimum.
But if you want to be absolutely certain, the gold standard is to let the test run for several hours, or even overnight. Some of the most frustrating memory errors are intermittent; they only rear their ugly heads after the RAM modules have heated up from being worked hard for a while. A longer test is your best shot at catching these sneaky faults.
Can I Use My Computer During a Memory Test?
Simply put, no. And that’s a good thing.
Powerful diagnostic tools like MemTest86 or the built-in Windows Memory Diagnostic run before your operating system boots up. This is intentional. It gives the software exclusive, direct access to every single memory cell without interference from Windows or macOS. Your computer is completely dedicated to the scan, so you won't be able to use it until the test is finished.
The whole point of a proper memory test is isolation. By running outside the OS, the diagnostic tool can rule out software conflicts and give you a pure, unfiltered assessment of the hardware's health.
My RAM Passed, but My PC Still Crashes. What Now?
It’s a frustrating scenario, but it happens. If you've run a thorough, multi-pass RAM test and it comes back clean, it's time to look elsewhere. The problem likely lies with a different component.
Based on our experience helping customers in Hamilton, the usual suspects are:
- An overheating CPU
- A failing power supply (PSU) that can't provide stable voltage
- Graphics card driver conflicts
- A problem with your main storage drive (SSD/HDD)
Start by monitoring your system temperatures under load and make sure all your hardware drivers are fully up to date. If you're interested in broadening your technical know-how, there are great resources that cover information technology courses and career paths.
Is It Safe to Open My Computer and Handle RAM?
For most desktop PCs, absolutely—as long as you follow the basic safety rules. It's not as intimidating as it looks.
First, always unplug the computer from the wall outlet. Then, press and hold the power button for about 10 seconds to drain any leftover electricity from the system. Most importantly, ground yourself before you touch anything inside. Just touch the bare metal frame of the computer case for a moment. This simple step prevents static discharge from zapping your sensitive components.
If you don't feel comfortable doing it yourself, that's perfectly fine. Calling a professional is always the safest option.
If you've run the tests and you're still stuck, or if you'd rather have an expert in Hamilton handle the whole process, Klimka Computer Solutions is ready to help. Visit us at https://klimkacomputersolutions.com for fast, honest, and affordable on-site service.
2 Responses
[…] a hidden culprit behind mysterious system lag. If you suspect this might be the issue, our guide on how to test RAM memory walks you through the diagnostic process. We’ve helped countless clients in Hamilton discover […]
[…] If you don't have enough RAM, your system is forced to use your much slower SSD or hard drive as a temporary "spillover" area. This is what causes those dreaded stutters and jarring frame drops right in the middle of the action. If you're experiencing hitches and suspect your memory is the culprit, our guide can show you https://klimkacomputersolutions.com/how-to-test-ram-memory/. […]