
Learning how to back up your computer files is pretty simple on the surface: you just make copies of your important stuff and save them somewhere else, like an external hard drive or a cloud service. But this simple action is your single best defence against losing irreplaceable family photos, critical business documents, or your creative portfolio.
The real trick is making it a regular habit, not just a one-time task you get around to eventually.
Why You Can’t Afford to Ignore File Backups
It’s so easy to push backing up files to the bottom of the to-do list. It feels like a chore, right up until the moment it becomes an absolute lifeline. We tend to think of data loss as some abstract, technical problem, but it hits close to home for people everywhere, from small business owners in Hamilton to families in Burlington.
Think about it: a sudden hard drive failure could wipe out years of your company's accounting records. A ransomware attack could encrypt every photo you have of your kids growing up. These aren't just scare tactics; they are everyday realities for people in the Hamilton area that cause immense financial and emotional stress.
Introducing the 3-2-1 Backup Rule
To guard against these threats, the pros rely on a simple yet powerful strategy known as the 3-2-1 backup rule. It’s a practical approach anyone in Hamilton can use.
Here’s how it breaks down:
- Three Copies: Always keep three copies of your important data. That means the original file on your computer, plus at least two backups.
- Two Different Media Types: Store your copies on at least two different types of storage. A common combination is an external hard drive and a cloud storage service.
- One Offsite Copy: Make sure at least one of those copies is stored offsite. This protects your data from physical disasters like a fire, flood, or theft that could affect your home or office in Hamilton.
This method ensures that no single point of failure can wipe out all your files. If your computer dies, you have the external drive. If something happens to your house, your cloud backup is safe and sound. To get started, it helps to understand the fundamentals of What is a backup? A clear guide for UK businesses.
A solid backup strategy isn't a luxury; it's an essential shield against data loss. Treating your data with this level of importance is fundamental to protecting your digital life.
The Real Cost of Neglecting Backups
Ignoring backups has real-world consequences. For a business in Hamilton, catastrophic data loss can lead to downtime, lost revenue, and a serious blow to customer trust. For an individual, it could mean the permanent loss of cherished memories.
When the worst happens, professional help is available. You can explore options for data recovery in Hamilton, Ontario, but setting up backups now is the best way to avoid ever needing that service.
Despite how critical it is, many people and even businesses struggle to manage backups properly. Recent data protection trends show that 51% of organizations spend over 10 hours a week just managing backups. Worse yet, only 35% can recover from a downtime event within a few hours, which points to a major gap in preparedness.
This just goes to show that knowing how to back up your computer files effectively is a skill that pays huge dividends in security and peace of mind.
Choosing Your Backup Method: Local vs. Cloud
So, you need to back up your computer. The first big decision you'll face is where to store those copies. It really boils down to two main camps: keeping your backups close by on a local drive, or sending them to a secure, off-site location in the cloud.
Think of it this way: a local backup is like having a fireproof safe in your Hamilton home office. It's fast, convenient, and you have the only key. A cloud backup is more like a safety deposit box at a bank—it's off-site, protected by professional-grade security, and safe from anything that might happen at your house.
Which one is right for you? Let's dig in.
The Case for Local Backups
Local backups mean saving your data to a physical device you own, like an external hard drive (HDD) or a super-fast solid-state drive (SSD). For many people in Hamilton, this is the go-to method, and for good reason.
The biggest win here is speed. If you're a photographer in the GTHA working with huge RAW image files or a video editor dealing with 4K footage, you can't afford to wait hours for files to upload. Plugging in a drive via USB-C or Thunderbolt lets you back up a whole day's work in just a few minutes. You're in complete control and not at the mercy of your internet connection.
The bottom line for local backups is speed and accessibility. You have total control over your data and, after buying the drive, there are no monthly fees to worry about.
But there's a catch. That local drive is just as vulnerable as your computer is. If your home office in Hamilton suffers a fire, flood, or even a simple break-in, you could lose both the original files and your backup in one fell swoop.
The Power of Cloud Backups
This is where cloud backup services come in. Companies like Google Drive, Microsoft OneDrive, or specialized providers store your files on their secure, remote servers.
This approach gives you incredible protection against local disasters. Your data is safely tucked away somewhere else, so even if the worst happens at your physical location, your digital life remains intact. It’s perfect for a student at McMaster University who needs to grab their assignments from a campus library computer, or a business owner who needs to access contracts while travelling.
The "set it and forget it" nature of cloud backups is another huge plus. Once configured, they work quietly in the background, automatically syncing your files as you create or change them. This peace of mind is a big reason so many people in Hamilton turn to data backup and cloud migration services.
One important thing for Canadians to consider is data residency. For privacy or legal reasons, some people and businesses need to ensure their data is stored on servers located within Canada. Always check where a cloud provider keeps your data before signing up.
Local Drive vs. Cloud Storage: A Quick Comparison
To make the right call, you need to weigh the pros and cons against what you actually do day-to-day. This table breaks down the key differences to help you see which option fits you best.
| Feature | Local Backup (External Drive/NAS) | Cloud Backup (Online Service) |
|---|---|---|
| Initial Cost | One-time hardware purchase | Ongoing monthly or annual subscription |
| Access Speed | Very fast; limited only by your drive and connection port (USB, etc.) | Depends entirely on your internet connection speed |
| Convenience | Requires manually plugging in the drive (unless you have a NAS) | Accessible from any device with an internet connection |
| Security Risk | Vulnerable to local physical risks like fire, flood, and theft | Protected from local disasters; relies on provider's security |
| Best For | Large files, quick recovery, and situations with no internet | Off-site disaster protection, multi-device access, automation |
Ultimately, looking at your own needs—the types of files you have, how often you need to access them, and your budget—will point you toward the right solution.
Why Not Both? The Hybrid Approach
For truly bulletproof protection, you don't have to choose just one. The best strategy is often a hybrid one, which is exactly what the 3-2-1 rule recommends.
Here’s how it works:
- Use a local external drive for fast, daily backups.
- Use a cloud service for secure, off-site disaster recovery.
This approach gives you the speed and convenience of a local drive with the ironclad, off-site protection of the cloud. You get the best of both worlds.
It's also worth noting the massive infrastructure behind our growing reliance on the cloud. The data centres that power these services are huge consumers of energy. In California, for example, electricity consumption by data centres nearly doubled between 2019 and 2023, a testament to the sheer scale of processing required for real-time backups. If you're interested in the environmental side, you can read more about these data centre health impacts.
In the end, choosing how to back up your computer is about striking the right balance between speed, cost, and security for your specific situation.
Practical Backup Guides for Windows and macOS
Alright, now that we've covered the "what" and "where" of backing up, it's time to roll up our sleeves and get into the "how." The good news is that both Windows and macOS come with excellent, free tools built right in. These aren't clunky afterthoughts; they're user-friendly utilities designed to get anyone, whether you're in Hamilton or anywhere else in Ontario, protecting their data.
We’ll walk through the most popular, built-in methods for each platform. Think of this as your go-to playbook for creating reliable backups without needing a degree in computer science.
This decision tree can help you visualize which path—local or cloud—might be your best starting point based on what you actually need.
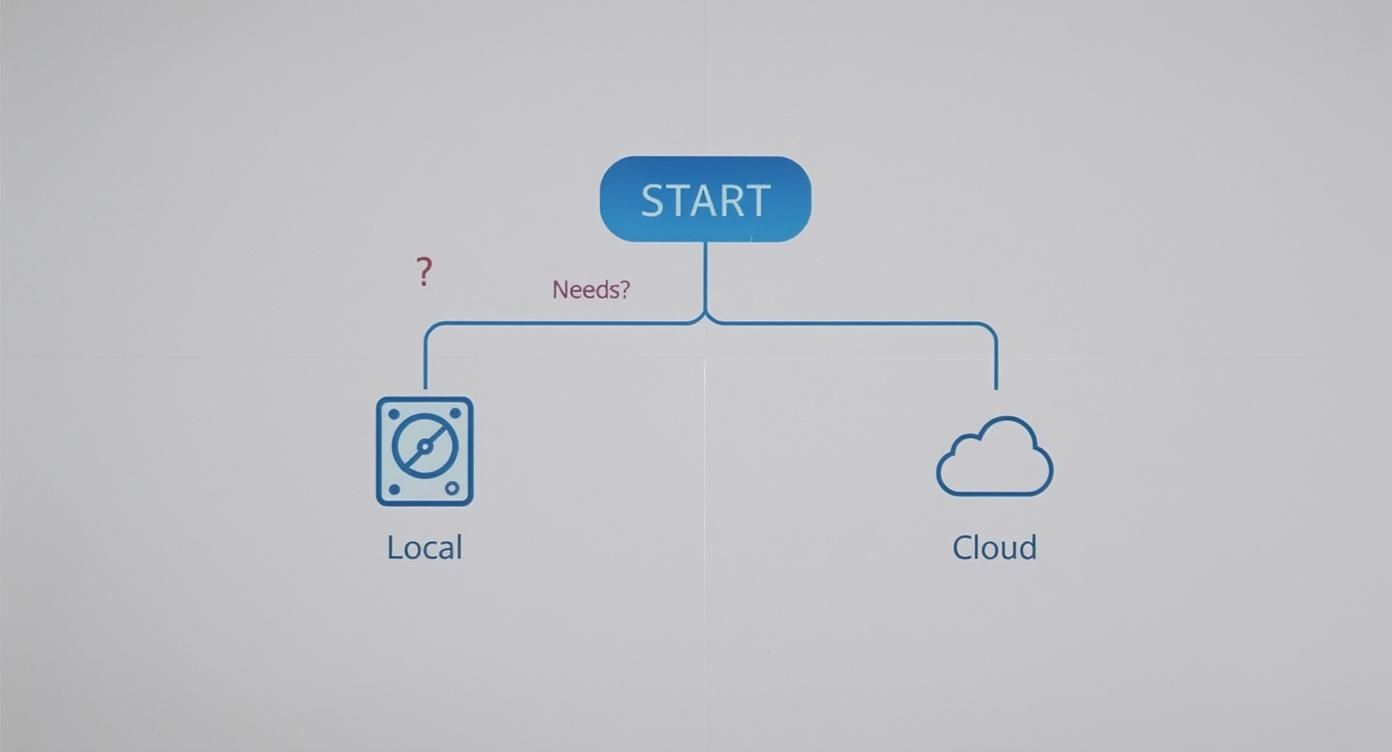
As you can see, your specific requirements—like needing lightning-fast local access versus iron-clad remote storage—are the first things to consider.
Setting Up File History on Windows
For anyone running Windows 10 or 11, your built-in solution is called File History. It’s a fantastic "set it and forget it" tool that automatically saves copies of your files to an external drive. The real magic isn't just that it saves a copy, but that it keeps multiple versions. You can literally go back in time and restore a document to how it looked last Tuesday.
To get started, you'll just need an external hard drive or SSD. Once you have your drive ready, setting it up is incredibly straightforward.
Getting Started with File History
- Plug your external drive into your computer.
- Open the Settings app, head to Update & Security, and then click on Backup.
- Look for "Back up using File History" and click Add a drive. Windows will find your connected drive—just select it.
And that's it. Once you've selected a drive, File History is officially on. It immediately starts backing up the essentials in your main user folders: Documents, Music, Pictures, Videos, and your Desktop.
Pro Tip: By default, File History backs up your files every hour. That's usually fine, but you can easily change it by clicking "More options." From there, you can adjust the backup frequency from every 10 minutes to just once a day and decide how long to keep older versions.
Sometimes, a solid backup is the first step before making bigger system changes. For instance, if you're struggling with persistent system issues, you might find our guide on how to reinstall the Windows operating system helpful—but always, always back up your files first.
Mastering Time Machine on macOS
Apple users have an equally powerful and elegant tool called Time Machine. It's been a core part of macOS for years, and for good reason: it’s incredibly simple and brutally effective. Time Machine creates incremental backups of your entire system, including your files, applications, and system settings.
This means you can restore your whole Mac to a specific point in time. It automatically keeps:
- Hourly backups for the past 24 hours.
- Daily backups for the past month.
- Weekly backups for all previous months.
When your backup drive eventually fills up, Time Machine is smart enough to automatically delete the oldest backups to make space for new ones.
Enabling Time Machine
- Connect an external hard drive to your Mac.
- More often than not, your Mac will automatically ask if you want to use this drive with Time Machine. If it does, just check the "Encrypt Backup Disk" box (I highly recommend this for security) and click Use as Backup Disk.
- If you don't get a prompt, just open System Settings, go to General, and select Time Machine. From there, you can click "Add Backup Disk" and choose your external drive.
Seriously, that's all there is to it. Time Machine will start its initial backup, which can take a while depending on how much stuff you have. After that, it will run quietly in the background, keeping your digital life safe without you having to lift a finger.
The Quick and Dirty Drag-and-Drop Method
Let's be realistic: sometimes you just need a quick copy of a few specific files. Maybe you’re handing off a project to a colleague in Hamilton or making a one-time archive of your finished thesis. For these kinds of tasks, the simple drag-and-drop method is perfectly fine.
Just plug in an external drive, open a new Finder or File Explorer window, and literally drag the folders you want to save over to the drive. It’s fast, direct, and requires zero setup.
However—and this is a big "however"—this is a terrible long-term strategy.
- It’s 100% manual: You have to remember to do it every single time.
- It’s prone to mistakes: It's way too easy to forget a crucial folder or accidentally copy an old version over a new one.
- No versioning: You only have the one copy you made at that moment. If that file gets corrupted, you're out of luck.
Think of dragging and dropping as a useful tool for a very specific job, not a replacement for a real backup system like File History or Time Machine. When it comes to consistently protecting your data, automation is your best friend.
Automating Your Backups for Complete Peace of Mind
Let's be honest: a backup you have to remember to run is a backup that will eventually be forgotten. Manual backups are certainly better than nothing, but their biggest weakness is human nature. We get busy, we put it off, and before we know it, weeks have gone by. This is why automation isn't just a nice feature—it's the heart of any truly reliable data protection plan for Hamilton residents.
The real genius of built-in tools like Windows File History and macOS Time Machine is their "set it and forget it" approach. Once you've got them configured, they work quietly in the background, creating a constant safety net for your digital life without you having to lift a finger. This silent, consistent process is what turns backing up from a dreaded chore into a seamless part of how your computer operates.
Going Beyond the Basics with Third-Party Software
While the built-in tools are fantastic for most home users, sometimes you just need more muscle. This is where third-party backup software really shines, offering advanced features for small businesses, creative pros, or anyone who wants more granular control over their data's safety. For users in Canada, popular options like Acronis, Macrium Reflect, and Carbonite are excellent choices.
These programs bring some powerful capabilities to the table:
- Full Disk Imaging: Instead of just copying files, this creates a perfect, bootable clone of your entire hard drive. That includes your operating system, all your programs, and your personal settings. If your main drive ever gives up the ghost, you can restore this image to a new one and be back in business in a fraction of the time it would take to reinstall everything from scratch.
- Advanced Scheduling: Want to run your backups at 3 a.m. when you're definitely not using your computer? No problem. You can set highly specific schedules to ensure the backup process never slows you down.
- Alerts and Notifications: Get an email or desktop pop-up confirming that your backup ran successfully—or, more importantly, an alert if it failed. This simple feedback loop is crucial for trusting that your system is actually working.
The Magic of Incremental Backups
One of the cleverest features used by both built-in and third-party tools is the incremental backup. After the first full backup is complete, the software doesn't waste time copying everything all over again. Instead, it intelligently scans for and saves only the files that have changed since the last run.
This method is incredibly efficient. It saves a huge amount of time and, just as importantly, conserves a massive amount of storage space on your backup drive.
Imagine you're a photographer editing a huge wedding album. An incremental backup won't re-copy the entire 50 GB project folder every hour; it will just grab the small changes you made to the few photos you edited. For anyone wondering how to back up computer files without constantly buying new hard drives, this is the answer. If you're looking for a reliable drive to get started, you can check out our guide on the best external hard drives for backup.
The goal is to move away from error-prone manual dragging and dropping to a smart, automated system that works for you 24/7. A proper backup strategy protects your valuable data without needing your constant attention.
Taking Your Data Protection to the Next Level
Setting up an automated backup system is a fantastic first step, but it’s not the end of the road. To build a truly bulletproof data safety net, we need to think beyond just making copies. It's time to focus on security and verification—making sure your data is not only saved but also safe, sound, and ready to be restored when disaster strikes.
This is where we move past the basics of backing up computer files and into the territory of professional-grade data management.
Lock It Down: Securing Backups with Encryption
Think about it: an unencrypted backup on an external hard drive is a huge security hole. If that drive gets stolen from your car in Burlington or goes missing from your Hamilton home, all your sensitive information—financial records, personal photos, business plans—is wide open for the taking.
Encryption is the answer. It scrambles your data, turning it into unreadable gibberish for anyone who doesn't have the password.
Luckily, both Windows and macOS have powerful, free encryption tools baked right in.
- On a Windows PC: The tool you're looking for is BitLocker. When you set up File History on an external drive, you'll have the option to enable BitLocker. You'll create a password and get a special recovery key. Crucially, store that key somewhere safe and completely separate from the drive itself.
- On a Mac: Apple’s version is called FileVault. When you first connect a drive to use with Time Machine, you'll see a simple checkbox that says "Encrypt Backup Disk." Just tick that box, set a strong password, and your Mac takes care of the rest.
Flipping that switch is a simple, one-time action that adds a permanent and powerful layer of security to your physical backups.
The Litmus Test: Can You Actually Restore Your Files?
Here’s a hard truth: a backup you've never tested is just a hope, not a plan. The whole point of this exercise is being able to get your files back, yet this is the one step nearly everyone skips. You have to confirm that your data can be successfully recovered.
Don't worry, you don’t need to do a full-blown system restore. It's actually a pretty simple and safe process.
Here's how to do a quick spot-check:
- Pick a few unimportant files. Grab a photo, a PDF, and maybe a spreadsheet—a good mix of file types.
- Simulate a "loss." Create a temporary folder on your desktop and move the original files there, so they're no longer in their original location.
- Bring them back. Fire up File History or Time Machine, navigate to where the files used to be, and restore them from your latest backup.
- Check your work. Open the restored files. Do they look right? Is the data intact?
Running this drill every few months gives you genuine peace of mind, knowing your system will actually perform when you need it most.
A backup isn't truly a backup until you've successfully restored a file from it. This simple test turns an abstract safety net into a proven, reliable tool you can count on.
Knowing When to Call in the Pros
While DIY solutions are great for most of us, there are definitely times when you need to bring in a professional. If you run a small business in a regulated field like finance or healthcare in Hamilton, or if you're managing massive amounts of absolutely critical data, a more robust strategy is essential.
Managed backup solutions offer some serious advantages:
- Expert Setup: A professional ensures your backup plan is properly configured and optimized from the get-go.
- Proactive Monitoring: They keep an eye on your backups, spotting failures and fixing issues before they turn into a catastrophe.
- Compliance & Security: They can make sure your data storage practices are up to snuff with industry-specific legal requirements here in Canada.
If you're upgrading to a new computer or need to migrate large volumes of information, professional data transfer services can make the whole process secure and painless. And remember, this guide is focused on your computer's files, but if your business has a website, you should absolutely look into dedicated website backup solutions to protect that crucial asset, too.
Your Backup Questions, Answered
Even with the best plan in place, you're bound to have questions when you start backing up your files. I get these all the time from folks across the Hamilton area, whether they're in Ancaster or Stoney Creek. Let's tackle some of the most common ones.
How Often Should I Actually Back Up My Files?
There's no single magic number here; it really comes down to how much data you can stomach losing.
For most people, a daily automated backup is the sweet spot. This is exactly what tools like Windows File History and macOS Time Machine are built for. You set them up once, and they quietly save your changes in the background every day. Easy.
But what if you're a small business owner in Hamilton juggling crucial client projects, or a student putting the final touches on your thesis? You'll want to be more aggressive. The best way to decide is to ask yourself, "How much of today's work am I willing to do all over again?" If the answer is "none," you should probably set your backups to run every hour.
Is Putting My Files in the Cloud Actually Safe?
That’s a great question, and one you should be asking. Handing your personal or business data over to another company can feel a bit unnerving. The short answer is yes, major cloud providers are incredibly secure—usually much more secure than your own home setup in Hamilton.
Think about what these companies have in place:
- Serious Encryption: Your files are scrambled into unreadable code both on their way to the server (in transit) and while they’re stored there (at rest).
- Fort Knox-Level Security: Their data centres are like fortresses with guards, strict access protocols, and backup power systems.
- Built-in Redundancy: Your data isn't just on one hard drive. It's copied across multiple machines in different locations, so if one fails, your files are still safe.
Honestly, your documents are often safer sitting in a professionally managed cloud than on a single external drive in your home office, which could be lost, stolen, or damaged.
What Do I Do If My Backup Fails?
First things first: don't panic. Getting a "backup failed" notification is actually a good thing. It means your system is working and caught a problem before you lost any data. Most of the time, the fix is surprisingly simple.
Start with the obvious checks:
- Is your external drive plugged in correctly? Try unplugging it and plugging it back in. Sometimes it's that easy.
- Has the drive run out of space? You might need to clear out some old, unneeded backups or think about getting a bigger drive.
- How's your internet? For cloud backups, a shaky Wi-Fi connection can stop the process in its tracks.
If none of that works, a good old-fashioned computer restart can often sort out any temporary software hiccups. If you keep getting the error, it might be time to call in a pro to see if there's a deeper issue with the drive or the software itself. The important thing is to deal with that warning right away.
When you've tried everything and are still stuck, having an expert you can trust is a game-changer. For fast, honest, and affordable help with your backup plan, data recovery, or any other computer headache in the Hamilton area, the team at Klimka Computer Solutions has your back. Visit our website to learn more about our services.
6 Responses
[…] the basics; for a guide on how to perform fundamental backups, consider reviewing this article on understanding the fundamental steps of backing up computer files. This foundational knowledge will help you better evaluate the advanced platforms we […]
[…] As the flowchart shows, features like offline cloning or multiple bays are meant for specific, often intensive, jobs. These tasks demand more attention to things like heat management. For a comprehensive look at protecting your data, our guide explains in detail https://klimkacomputersolutions.com/how-to-backup-computer-files/. […]
[…] the files you absolutely need. If you need a more detailed guide on this, you can learn more about how to back up computer files […]
[…] Given the circumstances, an external hard drive is the clear winner. If you want a deeper dive into the process, we have a complete guide on how to back up your computer's files. […]
[…] a good idea—it's non-negotiable. If you're a bit fuzzy on the details, our guide on how to back up computer files walks you through […]
[…] and make recovery impossible. For protecting your files before disaster strikes, our guide on how to backup computer files is a […]