
So, you’ve plugged a brand-new VGA HDMI cord into your computer and new monitor, only to be greeted by a stubbornly blank screen. It’s a common and frustrating moment for many people in Hamilton, but the reason is simple: your devices are speaking two completely different languages. Your older computer’s VGA port is analog, while your modern HDMI screen is digital. A simple, passive cable just can't translate between the two.
Why Your Simple VGA To HDMI Cord Fails
Connecting a vintage computer to a crisp, new monitor seems like it should be easy. You grab what looks like the right cable, plug it in, and… nothing. The issue isn't a faulty cable; it's a fundamental technology clash. Think of it like trying to play an old cassette tape in a modern Blu-ray player—even if you could somehow make it fit, the formats are worlds apart.
VGA (Video Graphics Array) is an analog signal standard that dates back to the late 1980s. It sends video information as a continuous, flowing electrical wave. HDMI (High-Definition Multimedia Interface), on the other hand, is a modern digital standard. It transmits both video and audio as a precise stream of ones and zeros. A basic cable is just a bundle of wires; it has no circuitry inside to convert that analog wave into digital code.
To get a clearer picture of why these two can't communicate directly, let's break down their core differences.
Analog (VGA) vs Digital (HDMI) Signal At A Glance
This table quickly shows why a simple wire can't bridge the gap between these two technologies.
| Feature | VGA (Analog) | HDMI (Digital) |
|---|---|---|
| Signal Type | Continuous electrical waves that can degrade over distance. | Discrete binary code (1s and 0s) for a pixel-perfect image. |
| Data Carried | Video only. Audio requires a separate cable. | Video and audio combined into a single, convenient stream. |
| Error Correction | No built-in error correction, making it prone to "ghosting" or noise. | Includes error correction to ensure the signal is received exactly as it was sent. |
| Encryption | No content protection. | Supports HDCP (High-bandwidth Digital Content Protection) to prevent piracy. |
| Best For | Legacy systems, older CRT monitors, and some projectors. | Modern TVs, monitors, gaming consoles, and home theatre systems. |
As you can see, we're not just dealing with different plug shapes; the very nature of the signals is incompatible.
The Real Solution: An Active Converter
To make this connection work, what you really need isn't a simple cord but an active VGA to HDMI converter. This little gadget is much more than just a cable. It's a miniature computer with a specialized microchip inside called an Analog-to-Digital Converter (ADC).
This chip does the heavy lifting: it takes the analog signal from your VGA port, actively processes and translates it into a digital format, and then sends that new digital signal out through the HDMI port.
The crucial takeaway is that the conversion from VGA to HDMI requires active processing. A passive cable only passes a signal through, which is why it fails when the signal types are different.
While high-quality digital cables like the Monacor Hdmc 1000 Sw cable are fantastic for straightforward digital-to-digital connections, they can't perform this analog-to-digital translation. Understanding this key difference saves you the headache and expense of buying useless hardware.
Here in Hamilton, we often see people run into this exact problem. Simply knowing to ask for an "active converter" instead of just a "cord" can solve display connection issues instantly. It's a common hurdle, much like the challenges people face when connecting different digital standards, a topic we explore in our guide on DVI to DisplayPort adapters.
Understanding The Difference Between A Cable And A Converter
When you can't get a picture on your screen, it's natural to blame the "cord." But here's the thing: not all cables are built the same. People often search for a "VGA to HDMI cord" and buy a simple passive cable, which just won't work for this job. What you actually need is an active converter, and the difference between the two is night and day.
Think of a passive cable as just a hollow pipe. It’s a bunch of wires connecting two differently shaped plugs, designed to let a signal pass straight through. This is fine if the signal type is the same on both ends, but it’s completely useless when you're trying to send an old-school analog VGA signal to a modern digital HDMI port.
The Brains Of The Operation: The Converter Chip
This is where an active VGA to HDMI converter comes in. It’s more than just a cable; it’s a small piece of hardware with a very important job. Tucked inside is an Analog-to-Digital Converter (ADC) chip—the "translator" that a passive cable is missing.
This tiny chip intercepts the analog wave from your computer, actively processes it, and completely rebuilds it into a clean, digital stream of ones and zeros. It’s this digital signal that your HDMI monitor or TV can actually understand.
This is exactly why so many cheap, passive cables you see online are so misleading. They look like an easy fix, but they’re missing the essential technology to do the conversion. It’s a common frustration we see with clients here in Hamilton who try to solve display issues on their own.
The image below gives a great visual of the fundamental difference between the analog signal VGA uses and the digital one HDMI needs.
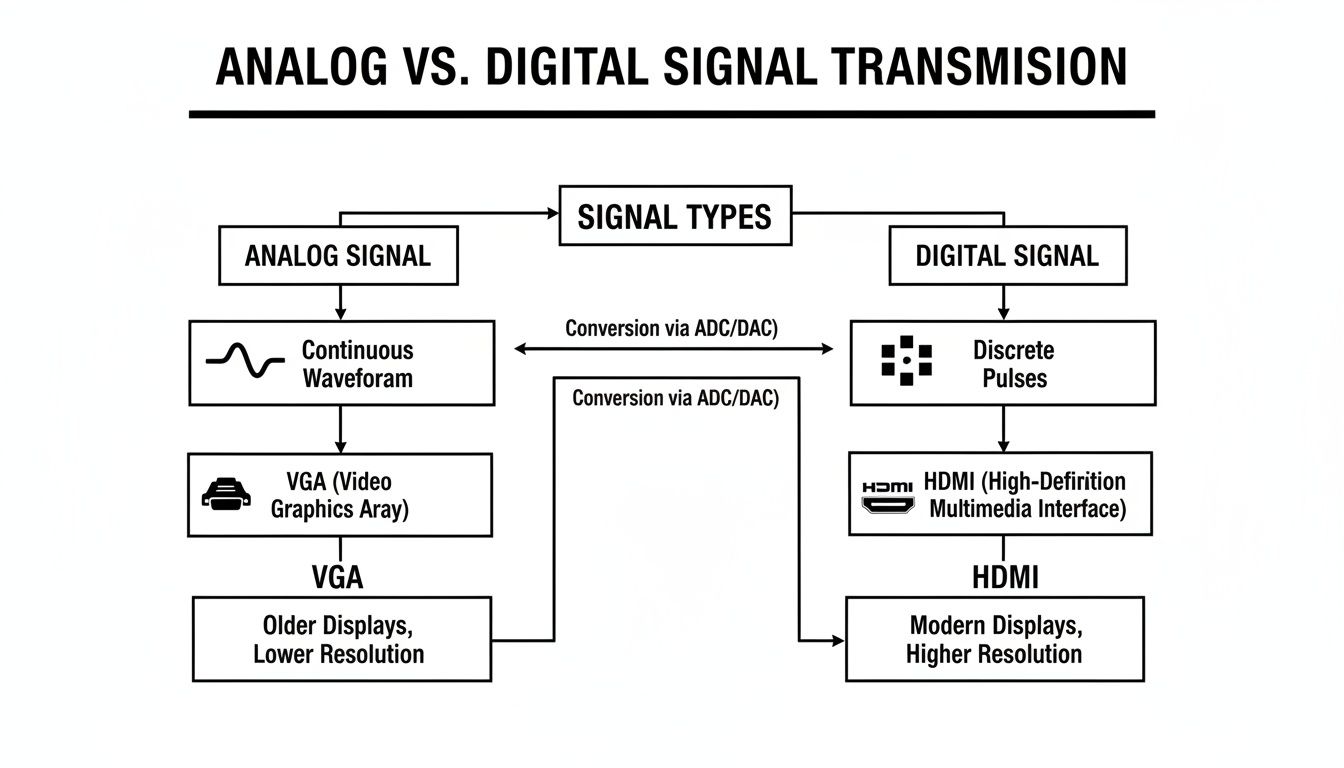
As you can see, an analog wave is continuous and variable. A digital signal, however, is made of precise, distinct blocks of information. You simply can't get from one to the other without a converter doing the heavy lifting.
Spotting The Right Tool For The Job
Once you know what to look for, you can avoid wasting time and money on the wrong gear. When you're shopping, keep an eye out for these clues that you’re getting a proper active converter and not a useless passive cable.
- Look for a small box or housing: The ADC chip and its circuitry need space. You'll usually see a small box-like component somewhere along the cable, not just the simple plugs at each end.
- Check for extra inputs: Active converters need power, which they typically get from a USB cable. They also often have a separate 3.5mm audio jack, since the VGA signal itself doesn't carry any sound.
- Read the description carefully: Reputable sellers will be clear about what they're selling. Look for keywords like "converter," "adapter," or "with chip" in the product title or description.
The core principle is simple: if the device doesn't have a way to actively process the signal, it won't work for connecting VGA to HDMI. It must perform an electronic conversion.
Understanding this hardware is the most critical step. We dive deeper into what makes an https://klimkacomputersolutions.com/tag/active-adapter/ so essential in other articles, but this knowledge is powerful. It even applies beyond just display connections. To get a better feel for the broader world of connectivity, it's worth exploring the different categories of computer network cables and their specific uses. Arming yourself with this info helps you confidently solve connection problems and buy the right hardware every time.
Key Details: Signal Direction, Audio, and Power
Okay, so we've sorted out the difference between a simple cable and a proper active converter. Now, let's dive into three crucial details that people often miss. Getting these right is the secret to a headache-free setup when you're connecting your VGA gear to an HDMI screen.
These three things—signal direction, audio, and power—are what will make your old computer and new display play nicely together.

A One-Way Street From VGA to HDMI
This is probably the most common mistake people make: assuming the converter works both ways. It doesn't. A VGA to HDMI converter is strictly a one-way device. Its entire purpose is to take an old-school analog signal from a source (like your desktop PC's VGA port) and send it to a modern digital display (like an HDTV or monitor with an HDMI input).
It absolutely cannot do the reverse. If you wanted to plug a new laptop with an HDMI port into an old VGA monitor, you'd need a completely different gadget: an HDMI to VGA converter.
Think of it like a one-way street for your video signal. The data can only flow from the VGA source to the HDMI display, never the other way around. Always double-check that you're buying the right converter for the job.
Solving the Audio Problem
Here’s another big thing to remember about VGA: it only handles video. That’s it. Unlike HDMI, which conveniently bundles video and audio together in one cable, VGA leaves sound completely out of the equation. This can be a frustrating surprise for folks in Hamilton trying to hook up an older computer to a TV for movies.
To get around this, a good VGA to HDMI converter will always include a separate way to handle audio. Here’s the setup:
- The converter will have a 3.5mm audio jack—the same kind you find on your phone or computer for headphones.
- You simply run an audio cable from your computer's headphone or "line-out" port to this jack on the converter.
The little chip inside the converter then works its magic, taking that separate audio feed and mixing it with the video. The result is a single, complete HDMI signal with both picture and sound ready for your TV or monitor.
The Importance of USB Power
That tiny chip inside the converter is doing some heavy lifting, constantly translating analog waves into digital ones and zeroes. This process doesn't happen by magic; it needs power. This is why any reliable VGA to HDMI cord needs to be powered.
Most converters get their juice from a simple USB connection. You'll see a USB cable attached to the converter that you need to plug into an available port—either on your computer, a wall charger, or even a USB port on the back of your TV. Without that power, the conversion chip won't turn on, and you’ll just get a blank screen. It’s a simple step, but it’s absolutely critical for a stable picture.
If you're exploring other ways to connect displays, you'll find that modern connectors often handle power and data very differently. We break this down further in our article covering the benefits of a USB to HDMI cable.
The need for these kinds of adapters isn't slowing down. The global HDMI cable market was valued at $3,567 million by 2025 and is expected to climb to $5,154.76 million by 2033, all thanks to our ever-growing demand for high-definition video. For local businesses serving the Hamilton community, knowing about these trends helps us give the best advice. You can read more about this growth in the full market report.
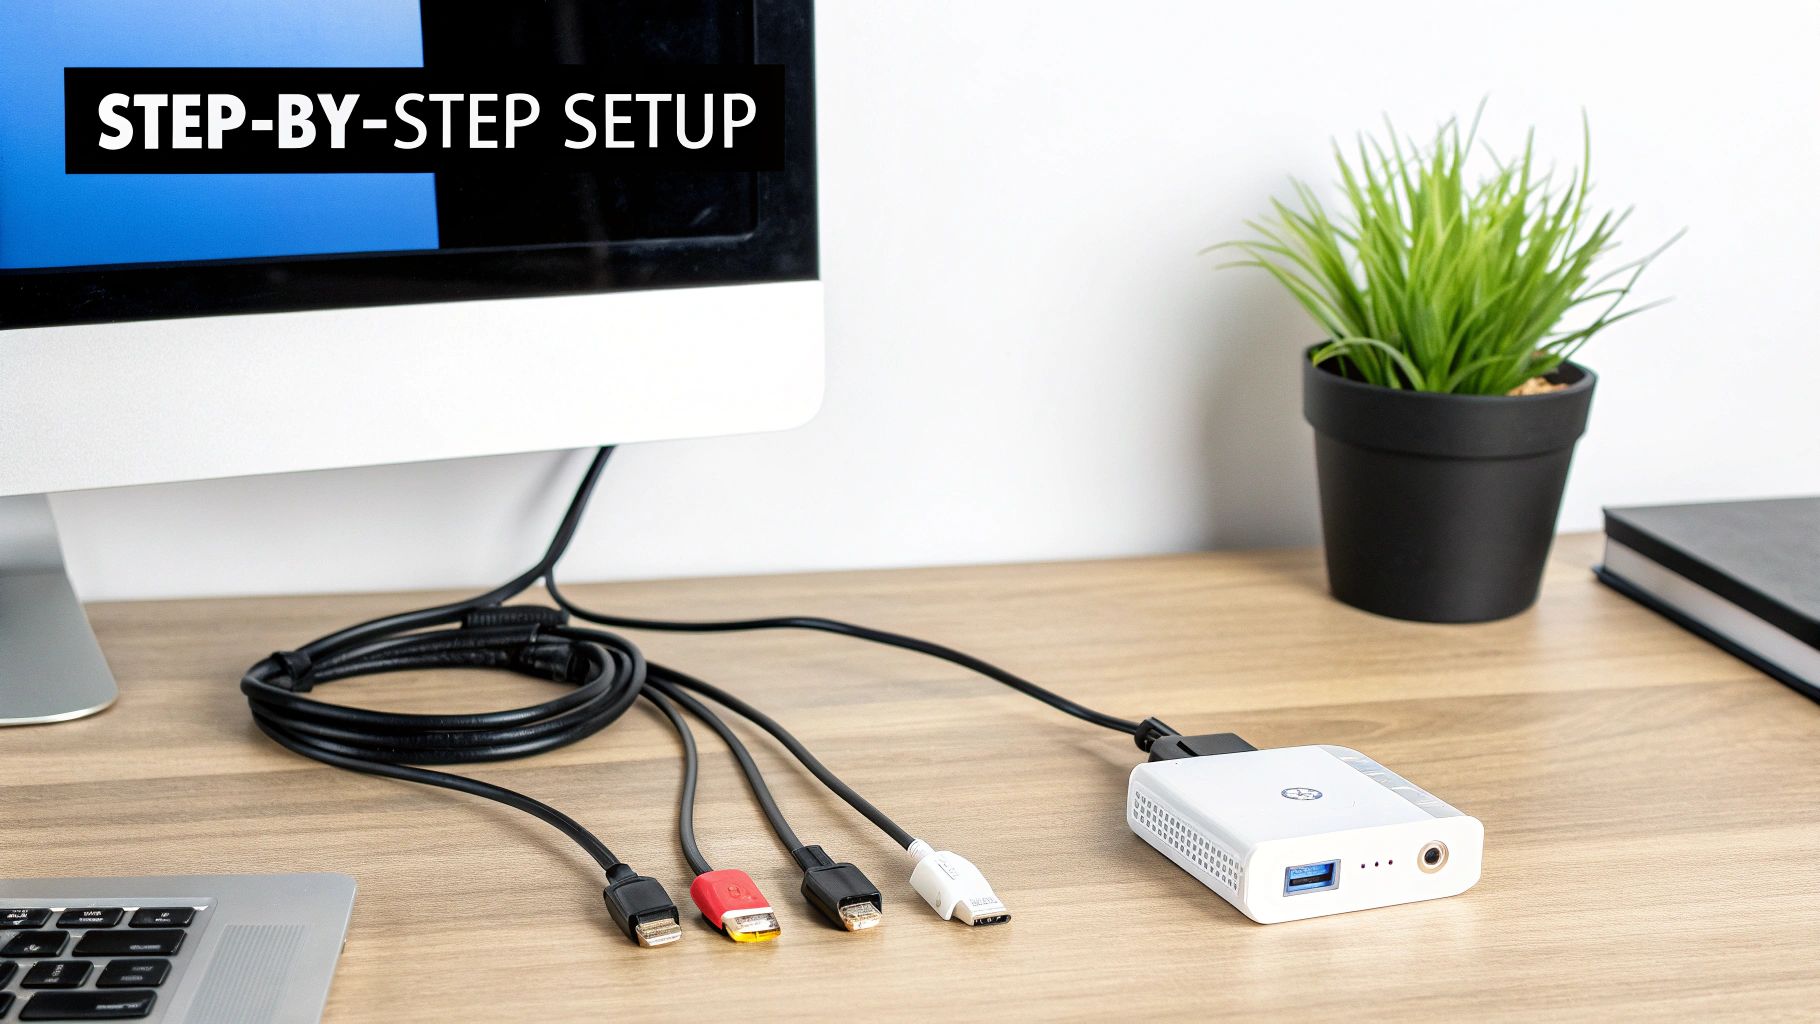
Your Step-By-Step Guide To A Perfect Connection
Alright, you've got the right active converter in hand. Now comes the easy part: plugging it all in. Connecting your older computer to a new display is pretty simple, but the order you do things in really matters. Following the correct sequence is the secret to avoiding those dreaded "no signal" errors and making sure your video, audio, and power all play nicely together.
Let’s walk through it, step by step. No guesswork required.
Before you touch a single cable, do yourself a favour and shut everything down completely. This simple precaution prevents any surprise electrical shorts and helps the devices properly recognise each other when you fire them back up.
The Six Steps To A Flawless Setup
Follow these steps in order for a smooth, headache-free installation. Taking a minute to connect everything correctly now will save you a ton of frustrating troubleshooting later on.
- Power Everything Down: First things first. Completely shut down your computer and turn off your monitor or TV.
- Connect The VGA Source: Grab your VGA cable and plug it into the VGA port on your computer. Connect the other end to the "VGA IN" port on the active converter box. Make sure both ends are snug.
- Plug In The Audio: Take the 3.5mm audio cable. Plug one end into your computer's headphone or line-out jack and the other into the audio input on the converter. This is a critical step if you want sound!
- Provide USB Power: Connect the converter's USB cable to an open USB port on your computer or a nearby USB wall adapter. This is what powers the tiny chip inside that does all the conversion work.
- Connect To The HDMI Display: Now, attach your HDMI cable to the "HDMI OUT" port on the converter. Plug the other end into an available HDMI input on your monitor or television.
- Power On In Order: This part is vital. Turn on your monitor or TV first. Switch it to the correct HDMI input channel. Only after the display is on and waiting for a signal should you power on your computer.
Following this specific sequence allows your computer's graphics card to "see" the display and its supported resolutions as it boots up.
Fine-Tuning Your Screen Resolution
Once your computer starts, your screen should spring to life. Don't be surprised if the picture doesn't look quite right at first, though. Your computer might default to a fuzzy, low resolution that doesn't do your new screen justice.
The most common issue after a successful setup is an incorrect screen resolution. Your VGA to HDMI cord converter can handle a maximum output—usually 1080p (1920×1080)—and you just need to tell your computer to use it.
The fix is easy. Just dive into your computer’s display settings (on Windows, you can right-click the desktop and select "Display settings"). From there, look for the resolution dropdown menu and choose the highest option available, like 1920×1080. This final tweak will give you the sharp, clear picture you were hoping for.
If your monitor still isn't displaying an image correctly after all this, it might point to a hardware problem. In that case, getting some professional advice on computer monitor repair in the Hamilton area is your best next step.
How To Troubleshoot Common Connection Issues
So, you’ve got your active converter, you’ve plugged everything in, and… nothing. A blank screen or a frustrating flicker can really put a damper on things, but don't panic. More often than not, the solution is surprisingly simple and doesn’t mean your new gadget is a dud.
Before you start worrying about faulty hardware, let’s run through a quick troubleshooting checklist. Think of this as the first-aid kit for your VGA to HDMI setup. Usually, one of these easy checks will get your picture and sound back in business.
The No Signal or Flickering Screen Checklist
Seeing that dreaded "No Signal" message is probably the most common headache, but it's also one of the easiest to cure. It almost always means something in the connection chain is loose, unplugged, or not getting the power it needs. A flickering screen often points to the very same culprits.
Work your way down this list first:
- Check Every Connection: This one sounds obvious, but it solves problems more than half the time. Give both ends of the VGA, HDMI, audio, and USB cables a gentle but firm push to make sure they're seated securely. A plug that’s even a millimetre out can kill the signal.
- Confirm USB Power: Remember that active converter? Its brain—the conversion chip—needs power to work. Make sure its USB cable is plugged into a functioning USB port. If you’re not sure the port is working, try another one. No power means no picture.
- Select The Correct HDMI Input: Your TV or monitor likely has a few HDMI ports (HDMI 1, HDMI 2, etc.). Grab your remote or use the buttons on the display itself and cycle through the inputs. You need to be on the exact one the converter is plugged into.
- A Simple Restart: It's the oldest trick in the IT book for a reason! Turn off your computer and your display. Give them a good 30 seconds to sit, then power them back on—start with the display, then the computer. This simple sequence forces them to re-establish their connection from scratch.
Checking For Driver and Audio Issues
If you've checked all the physical connections and still have no luck, the issue might be lurking in your computer’s software or audio settings. These are also quick fixes.
Outdated Graphics Drivers: The graphics driver is the piece of software that tells your computer how to talk to a screen. If it's out of date, it might not know how to handle the signal from the converter. A quick web search for "how to update graphics drivers" for your specific computer model will give you simple, step-by-step instructions.
Missing Audio: Got a perfect picture but complete silence? The culprit is almost always the 3.5mm audio cable. Double-check that it’s plugged snugly into your computer's headphone jack and the corresponding audio port on the converter. You should also pop into your computer’s sound settings and make sure the audio output is set to the right device.
If you've gone through all these steps and are still staring at a blank or misbehaving screen, it might point to a bigger problem. The converter itself could be faulty, or there could be an issue with your computer’s VGA port.
When DIY troubleshooting hits a wall, it’s a good time to get an expert opinion. Our Hamilton-based team can quickly get to the bottom of it. If you're stuck, you can learn more about how we fix computer issues and get your setup running smoothly.
Got Questions About VGA to HDMI? We’ve Got Answers
Even after you get everything hooked up, it's natural to have a few lingering questions. The world of adapters can be a bit confusing, and you might wonder why your setup is behaving a certain way. Let's clear up some of the most common things we get asked about using a VGA HDMI cord converter.
Can I Use This To Connect My New Laptop To An Old VGA Monitor?
In a word, no. A "VGA to HDMI" converter is strictly a one-way street. It’s designed to take a signal from an older VGA source (like a desktop PC) and send it to a newer HDMI display (like a modern TV). The signal only flows in that one direction.
To connect a modern laptop with an HDMI port to an old monitor that only has a VGA input, you’ll need the opposite device: an "HDMI to VGA" converter. It does the same job of translating the signal, just in the other direction. Always make sure the adapter matches your signal path, from the source to the screen. If you're in the Hamilton area and need a hand picking out the right one, our team can definitely point you in the right direction.
Will A VGA to HDMI Converter Actually Improve My Video Quality?
Think of a converter as a translator, not a miracle worker. Its job is to change the signal from analog to digital, not to magically enhance the video quality coming from your computer's VGA port. A good converter will preserve the original signal as faithfully as possible, preventing any quality loss during the translation.
The resolution you see on screen is ultimately capped by what your computer’s graphics card can push out through its VGA port, which is typically 1920×1080 (1080p). The converter can't upscale a 1080p signal to 4K; it just makes sure your older computer can be displayed on a modern screen at its own best possible quality.
Why Is My Screen Resolution Stuck On A Low Setting?
This is a classic problem, and it usually boils down to one of two culprits. First, your computer's graphics drivers might be out of date. If they're old, they might not know how to properly talk to the new display setup. A quick driver update is often all it takes to fix this and unlock all the resolution options.
The second common reason is the converter itself. Every converter has a maximum resolution it can handle. If you try to set a resolution that's higher than what your converter is rated for (like pushing 1440p through a 1080p adapter), your computer will likely play it safe and default to a lower, stable resolution. Always check the specs on your VGA HDMI cord converter.
It's perfectly normal for an active converter to feel a bit warm to the touch. That little chip inside is working hard to translate the video signal in real-time, and that process generates some heat.
However, if the device gets so hot you can't comfortably hold it, that could signal a problem. It might be a faulty unit, an issue with the USB power source, or just poor ventilation. If you're worried about it getting too hot, unplug it immediately. For folks in Hamilton, a local expert like Klimka Computer Solutions can offer professional advice.
When you need reliable, on-site computer support in the Hamilton area, trust the experts at Klimka Computer Solutions. From solving tricky connection issues to performing hardware repairs and data recovery, we provide fast, honest, and affordable service to get your tech working perfectly. Visit us online to learn more about our computer repair and IT support services.
One Response
[…] systematic process for troubleshooting cable connections is just as critical here as it is for any other connectivity problem. Let’s get […]