
So, what exactly is an AC1750 Wi-Fi range extender? Think of it as a signal booster for your home network. It grabs the Wi-Fi signal from your existing router and rebroadcasts it, pushing a reliable connection into those frustrating dead zones.
The AC1750 part of the name tells you about its speed capabilities. It’s a dual-band device that can deliver up to 1300 Mbps on the 5 GHz band and 450 Mbps on the 2.4 GHz band. This kind of power is perfect for handling the high-speed internet plans common in the Greater Hamilton Area.
Solving Wi-Fi Dead Zones in Your Hamilton Home

If you're battling Wi-Fi dead spots in your Hamilton, Ancaster, or Dundas home, you're definitely not alone. It's a story we hear all the time from our clients, whether they're in an older brick house in the North End or a newer, more spread-out home in Ancaster.
An ac1750 wi fi range extender is one of the most practical and effective tools for this job. It's built to keep up with the faster internet plans from local providers like Bell and Cogeco, making sure your connection stays strong from the front door to the back patio.
This is about more than just numbers on a box; it's about making your digital life work. It means finally getting smooth 4K streaming in the basement, enjoying lag-free gaming upstairs, and holding a video call from your home office in Burlington without the dreaded freeze.
Why AC1750 Is a Perfect Fit for Hamilton Homes
The timing of this technology was spot-on for local needs. When models like the TP-Link AC1750 Wi‑Fi Range Extender RE450 hit Canadian shelves around 2015–2016, it was right as the whole country was shifting to faster home internet, especially here in Hamilton and the surrounding GTHA.
Its dual-band design was practically tailor-made for the typical two-storey, 1,500–2,500 sq. ft. Canadian houses you see all over the Hamilton Mountain and Stoney Creek. It was the right tool at the right time.
Of course, a range extender is a powerful piece of the puzzle, but it’s not the only one. It’s always a good idea to understand some general tips to improve WiFi signal strength to get the absolute most out of your network.
Technician's Takeaway: We often find that the biggest hurdle for homeowners in Hamilton is realising an extender isn't a "magic box." Its performance is directly tied to where you put it and how you set it up. That’s exactly what this guide will help you nail down.
What to Expect from This Guide
Over the next few sections, I’m going to walk you through the same process our technicians at Klimka Computer Solutions use to stamp out weak signals for good. My goal is to give you the practical knowledge to get your network running perfectly.
Before we jump into the setup, brushing up on the basics can be a huge help. You can check out our other guide on how to improve Wi-Fi signal for more foundational strategies.
Finding the Perfect Spot for Your Extender
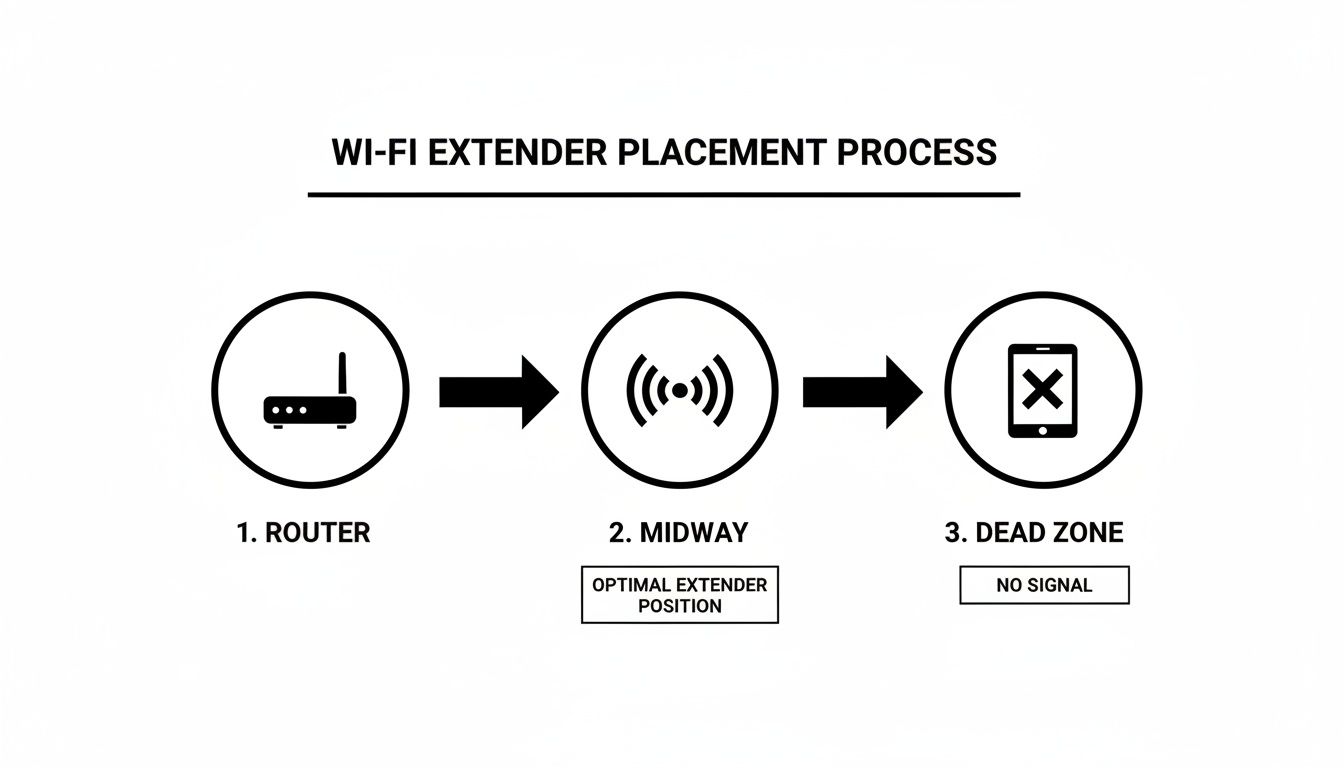
Getting the most from your AC1750 Wi‑Fi range extender comes down to one thing: placement. It’s a common instinct to plug it directly into the room with the worst signal, but that's actually the opposite of what you want to do. For an extender to work its magic, it first needs to receive a strong, stable signal from your main router.
Think of it like a relay race. Your extender is the next runner, and you wouldn't position them at the finish line. You'd place them halfway, where they can grab the baton while still at full speed. Your extender works the same way—it needs to be in a spot where it can still get a solid connection from the router before it can pass that signal along.
The "Goldilocks" Principle of Placement
The perfect location is what I call the "Goldilocks spot"—not too close to your router, but definitely not too far away. In most Hamilton homes, this is roughly midway between your router and the Wi-Fi dead zone you're trying to eliminate.
If you place it too close, you're not really extending the network into the far corners of your home. Put it too far away, and you're just rebroadcasting an already weak and choppy signal, which results in frustratingly slow speeds.
To get this right without a lot of guesswork, you can use a Wi-Fi analyzer app on your smartphone. Just walk around your space and keep an eye on the signal strength, which is measured in dBm. You're looking for that sweet spot where the signal from your main router is still reliable but is close enough to push strong coverage into the dead zone.
For many homes I've worked on in Hamilton, a central hallway or the top of a staircase is an excellent starting point, as it often provides a clear line of sight to multiple rooms.
Let the Intelligent Signal Light Be Your Guide
Luckily, your AC1750 extender comes with a handy built-in feature to help you out. The intelligent signal light is designed specifically to take the mystery out of placement. Once you plug the extender in, the light will change colour to show you the strength of the signal it's getting from your router.
Here's what those colours typically mean:
- Solid Blue: You've found a great spot! The connection to the router is strong and stable.
- Solid Red (or Amber): The signal is too weak here. The extender is too far from the router and you'll need to move it closer.
- Off: There's no connection to the router at all.
Just move the extender from outlet to outlet, giving it a minute each time for the light to stabilize. In just a few minutes, you'll find the best location for a rock-solid connection.
Technician's Insight: The goal is to find the outlet closest to your dead zone that still gives you that solid blue light. This ensures you're pushing the strongest possible signal into the area that needs it most.
Common Placement Mistakes to Avoid
Our technicians see the same placement mistakes over and over again in Hamilton homes. Simply avoiding these common pitfalls can make a huge difference in your network’s performance. If you want to go deeper, our guide on home and office network optimization in Hamilton covers these and other advanced strategies.
Try not to place your extender:
- Behind large furniture or a TV: These are big, physical objects that literally block Wi-Fi signals.
- Near microwaves or cordless phones: These appliances often operate on the same 2.4 GHz frequency and are notorious for causing signal interference.
- On the floor: Wi-Fi signals tend to radiate outwards and slightly downwards. Keeping the extender elevated helps the signal travel much farther.
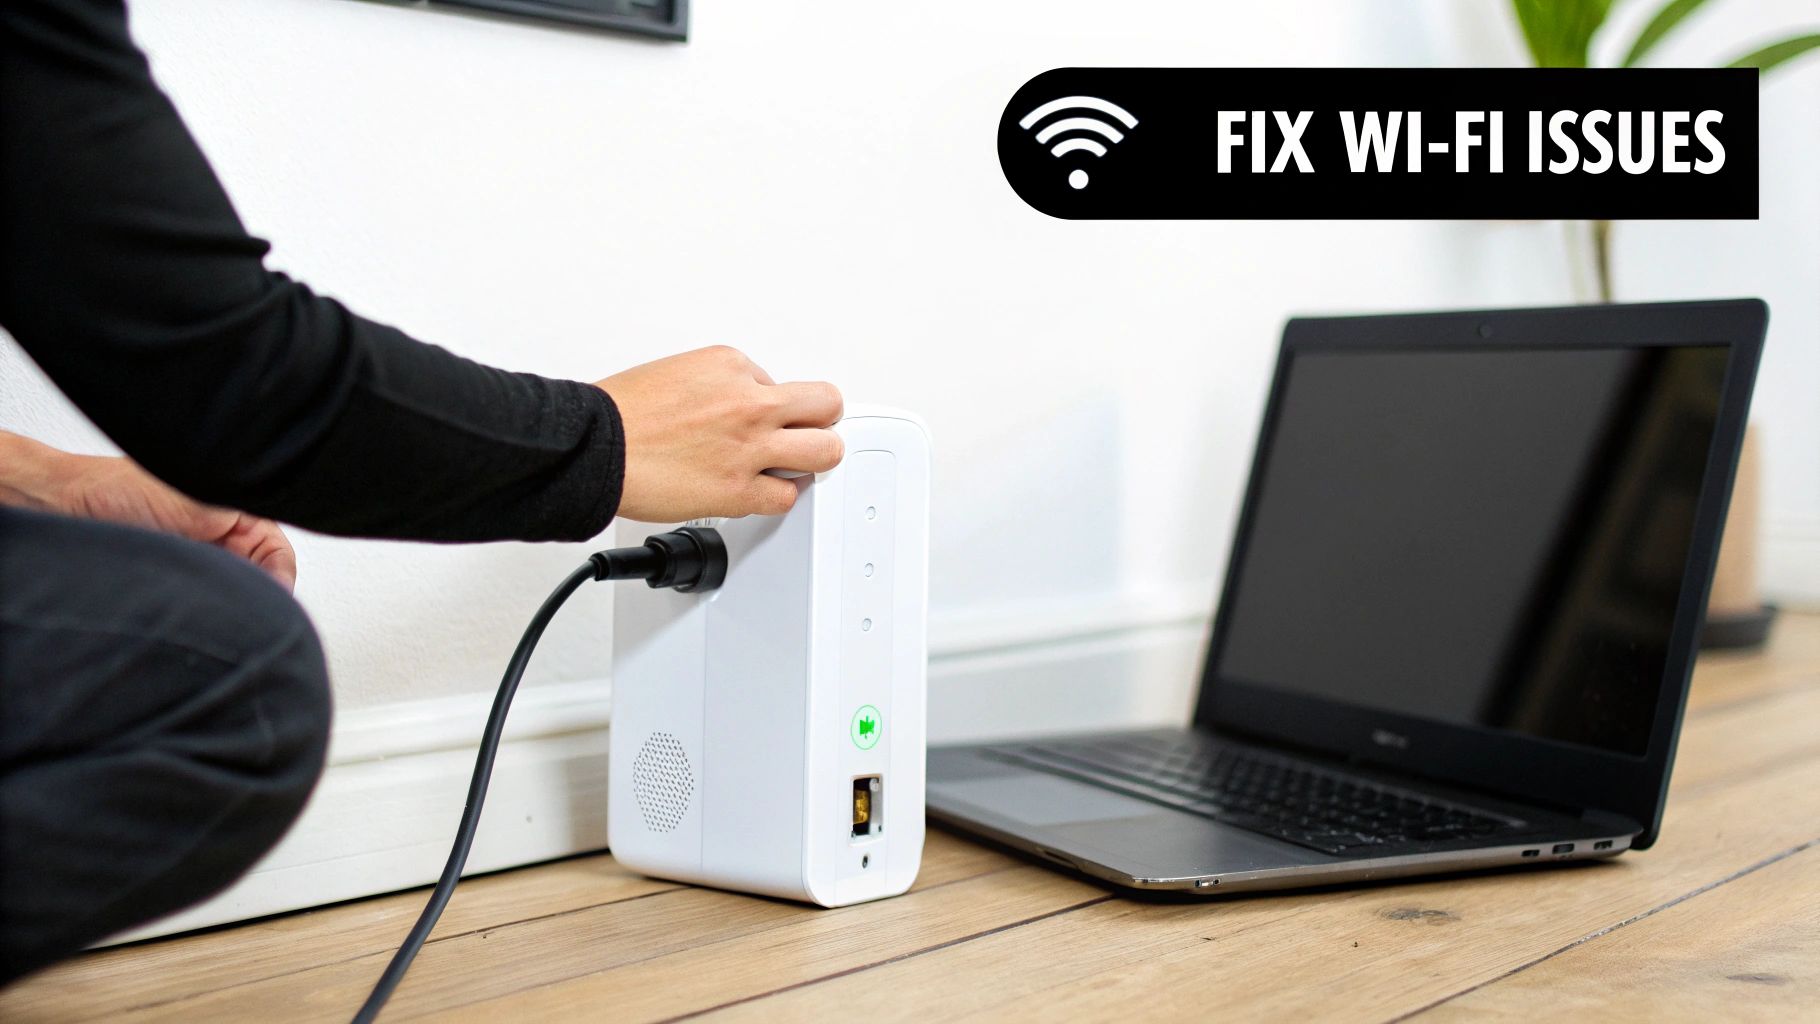
Getting Your Extender Connected: A Practical Guide
Alright, you've found the sweet spot for your ac1750 wi fi range extender. Now for the final piece of the puzzle: connecting it to your home network. You've got two main ways to do this, and honestly, both are pretty painless. Which one you pick really just comes down to your router's capabilities and how much you like to tinker with settings.
The fastest route is using WPS (Wi-Fi Protected Setup). It’s a simple push-button method that securely pairs your router and extender without needing to type in a single password. It's my go-to for a quick and easy setup.
If your router is a bit older and doesn't have a WPS button, or if you just prefer to have more control over the process, the manual web browser setup is your best bet.
The Easiest Way: One-Touch WPS
The WPS method is about as simple as it gets. First, plug the extender into an outlet near your main router just for the initial setup. Once its lights come on, press the WPS button on your router.
You now have about two minutes to walk over to the extender and press its WPS button. You'll see the lights start to blink as it searches for and connects to your router. Give it a minute or so, and the light should turn solid (usually blue), which means you have a solid, secure connection. That's it—you're online in under five minutes.
The Hands-On Approach: Manual Web Browser Setup
No WPS button? No problem. The manual setup is just as effective and gives you a peek under the hood at your network settings. For this, you'll connect directly to the extender’s own temporary Wi-Fi network to get it configured.
Here’s how it works:
- Plug in the extender and wait for it to power up completely.
- Grab your laptop or phone and open its Wi-Fi settings. You should see a new, open network, usually named something like TP-LINK_Extender. Connect to it.
- Once you're connected, open any web browser. You should be automatically redirected to the extender’s configuration page. If that doesn't happen, just type the setup web address from the user manual into your browser's address bar.
This is where finding that perfect midway point before you start the setup process is so crucial.
The setup wizard on the page will walk you through the rest. It will scan for nearby Wi-Fi networks; just pick your home network from the list.
You'll then be asked for your existing Wi-Fi password to authorize the connection. Once you enter it, the extender will save the settings, reboot, and start broadcasting your newly extended network.
Klimka Pro Tip: When you're setting things up manually, I always recommend giving the extended network a slightly different name (SSID). For example, if your main network is “MyHamiltonHome,” call the new one “MyHamiltonHome_EXT.” This little trick makes it crystal clear which network you’re connected to and can save you a lot of headaches if you ever need to troubleshoot.
While we're talking about extenders, many of these setup principles apply across different models. If you're curious, we have a similar walkthrough for the TP-Link AC750 that you might find helpful.
Fine-Tuning Your Settings for Peak Speed and Stability
Getting your ac1750 wi fi range extender connected is the first major win, but now it's time to really dial it in. This is where we go from just extending your network to making it as fast and reliable as possible. The biggest performance boost comes from how you manage your Wi-Fi bands.
Your extender is now broadcasting two distinct networks: the far-reaching 2.4 GHz band and the much faster 5 GHz band. The secret to a smooth-running home or office network in the Hamilton area is putting your devices on the right one. Think of it as creating an express lane for your most important traffic.
The 2.4 GHz band is your steady, long-distance runner. It pushes a signal further through walls and floors, making it perfect for devices that need a solid connection but don't require massive amounts of data.
Choosing the Right Band for Your Devices
On the flip side, the 5 GHz band is all about pure speed. It's significantly quicker than 2.4 GHz but doesn't have the same reach. This makes it the perfect choice for high-demand devices that are relatively close to your extender or router.
Here’s a quick-reference table to connect your devices to the best network for optimal performance in your Hamilton home.
Choosing the Right Wi-Fi Band for Your Devices
| Device Type | Recommended Band | Reason |
|---|---|---|
| Smart TVs, Gaming Consoles, Laptops | 5 GHz | These need top-tier speed for buffer-free 4K streaming, low-latency gaming, and fast downloads. |
| Smartphones & Tablets | 5 GHz | When you're browsing, streaming, or video calling, the speed of the 5 GHz band makes a noticeable difference. |
| Smart Home Gadgets (Plugs, Lights, Thermostats) | 2.4 GHz | These devices use very little data and often need a stable signal in distant corners of the house. |
| Security Cameras & Doorbells | 2.4 GHz | A reliable, long-range connection is more critical here than raw speed. |
By separating your traffic this way, you stop your smart plugs and thermostats from slowing down your movie night or online gaming session. Everything just works better. For a deeper dive into these concepts, check out our complete network setup and optimization guide.
Keeping Your Extender Secure and Fast
Just like your computer or smartphone, your extender needs a little TLC to perform its best. The single most important task is keeping its firmware up to date. This is the core software that runs the device, and manufacturers release updates to patch security vulnerabilities, improve speed, and add features.
Checking for an update is easy. Just log back into the extender’s admin page—the same one from the manual setup. You're looking for a menu item like “Firmware Update” or “System Tools.” From there, the extender can usually check for updates automatically and walk you through the installation in a few clicks.
Expert Insight: Set a reminder to check for a firmware update every couple of months. It’s a five-minute job that’s one of the best things you can do to keep your network secure and running at its full potential.
Now for the best part: seeing the results. Take your phone or laptop to those old Wi-Fi dead zones—the basement office, the far bedroom, the back patio—and run a speed test. The difference should be night and day.
The ac1750 wi fi range extender is a fantastic solution for exactly this problem in Hamilton. We often see it used to bring solid Wi-Fi to basements, detached garages, and attic rooms, which are notoriously tough spots in the area's older brick homes. In a typical Hamilton home with a 300 Mbps internet plan, it's not uncommon for speeds in those far-off rooms to drop below 20 Mbps. A properly placed extender can easily push those speeds into the 80–150 Mbps range, a massive and very noticeable improvement. Knowing your network is truly optimized gives you real peace of mind.
Troubleshooting Common Wi-Fi Extender Issues
Even with the most careful setup, technology can be a bit finicky. If your new AC1750 Wi-Fi range extender isn't cooperating, don't throw in the towel just yet. The good news is that most extender problems are things we see all the time, and the fixes are usually straightforward.
Let's run through the most common hiccups, from connections that drop out of nowhere to speeds that crawl. We'll start with the simplest solutions first—because nine times out of ten, that's all you'll need.
Frequent Disconnections or Unstable Signal
Is your connection playing hide-and-seek, even when the extender’s signal light is a confident, solid blue? That kind of instability usually points to a subtle placement issue or a simple software glitch. Before you lose your patience, run through this quick checklist.
- The classic reboot: I know, I know—"have you tried turning it off and on again?" But it works. Unplug both your router and the extender. Give it a full 60 seconds to clear its memory, then plug the router back in. Wait for it to come completely online before plugging the extender in to reconnect.
- Check for interference: In busy Hamilton neighbourhoods like Westdale or Corktown, you're competing with a lot of other Wi-Fi signals. Log in to your main router's settings and try switching the Wi-Fi channel to a less congested one, like 1, 6, or 11, which don't overlap.
- Edge it closer: Even with a good initial signal reading, something in your home—like a new appliance or even thick plaster walls—could be causing intermittent trouble. Try moving the extender just one outlet closer to your router and see if that stabilizes the connection.
Slow Speeds Despite a Strong Connection
You've got full bars, but loading a webpage feels like dial-up. What gives? This classic symptom usually means your extender is dutifully repeating a weak signal it's getting from the router. A slow signal in means a slow signal out, no matter how strong it looks on your device.
Your first move should be to re-check the placement using the extender's intelligent signal light. If it's not a solid blue, you've found your culprit. If it is blue and speeds are still poor, a factory reset is your next best bet. It wipes the slate clean of any tangled settings that might be bogging it down.
Pro Tip for a Factory Reset: Find the small, recessed reset button on your extender. Use a paperclip to press and hold it for about 10 seconds until the lights flash. You'll have to run through the initial setup again, but this simple step resolves a surprising number of persistent speed issues.
If you’ve tried all these tricks and are still stuck in the slow lane, the problem might be more complex than the extender itself. For a deeper dive into network issues, check out our guide on Wi-Fi troubleshooting in Hamilton, which covers some of the more advanced techniques we use in the field.
When It’s Time to Call in a Wi-Fi Expert in Hamilton
Let's be honest, sometimes even the best ac1750 wi fi range extender can’t quite solve the puzzle. You’ve done everything right—you’ve mapped out the perfect spot, tweaked every setting, and run through all the troubleshooting steps—but you’re still staring at one bar of signal in the basement. If that sounds familiar, it might be time to bring in a professional.
This is a common story in certain Hamilton neighbourhoods. A sprawling multi-storey home in Ancaster or a classic brick house in Dundas with those notoriously thick plaster walls can create Wi-Fi dead zones that a single extender just can't muscle through. Those dense materials are like kryptonite for wireless signals.
The same goes for anyone running a small business from home in Burlington or Waterdown. If your livelihood depends on a rock-solid connection for video calls or processing payments, cobbling together a solution isn't good enough. You need something more robust.
A Professional Site Survey: Taking the Guesswork Out of Wi-Fi
This is where a professional Wi-Fi site survey makes all the difference. It’s a game-changer. Instead of just guessing where the problem is, a technician uses specialized equipment to create a detailed map of your home’s signal strength. They can see exactly where the signal drops off and identify pesky sources of interference you'd never find on your own. It's a proper, data-driven diagnosis for your local property.
With that detailed analysis in hand, an expert can design a solution that's truly built for your space. Often, the issue isn't the extender itself, but that your home’s layout needs a different kind of tool for the job.
- Mesh Wi-Fi Systems: These are fantastic for larger homes. They use several interconnected nodes placed around your property to create one big, seamless network. No more signal drop-offs as you move from room to room.
- Wired Access Points: If you need bulletproof reliability for a home office or a detached workshop, nothing beats a hardwired connection. Running an Ethernet cable to a dedicated access point delivers pure, uncompromised speed and stability.
If you’re facing persistent extender issues and need a hand, you might also look into general IT Support in Hamilton for a local resource that can help with broader tech challenges.
At Klimka, we find that in about 15% of homes we visit in the Hamilton area, a single range extender just isn't the right fit due to the building's layout or materials. A site survey quickly tells us if a mesh system is the smarter long-term solution.
Finally Getting a Network That Just Works
At the end of the day, you just want a secure, reliable network that you don’t have to constantly fuss over. If your Wi-Fi is still a daily frustration, don't keep fighting it. A quick chat with an expert can set you on the most effective and affordable path to getting the flawless coverage you’ve been looking for.
For a professional consultation on a fully optimized and secure network for your Hamilton home or business, contact the experts at Klimka Computer Solutions. Learn more at https://klimkacomputersolutions.com.
One Response
[…] condo. In those cases, a simpler fix might be all you need. Our team can help you figure out if an AC1750 Wi-Fi range extender or another solution is a better fit for your space and […]